Sendgrid
Welcome to the Sendgrid Integration section of Jarvis Helpdesk! This guide will walk you through the process of integrating Sendgrid with the Jarvis Helpdesk system.
Integration Steps
- To integrate Sendgrid into the system, users need to create an API key for their Sendgrid account first.
- On the Sendgrid homepage, go to Settings in the left navigation bar, then select API Keys and click Create API Key

Create Sendgrid API key
- Name your API Key and select Full Access, Restricted Access, or Billing Access, then click Create & View
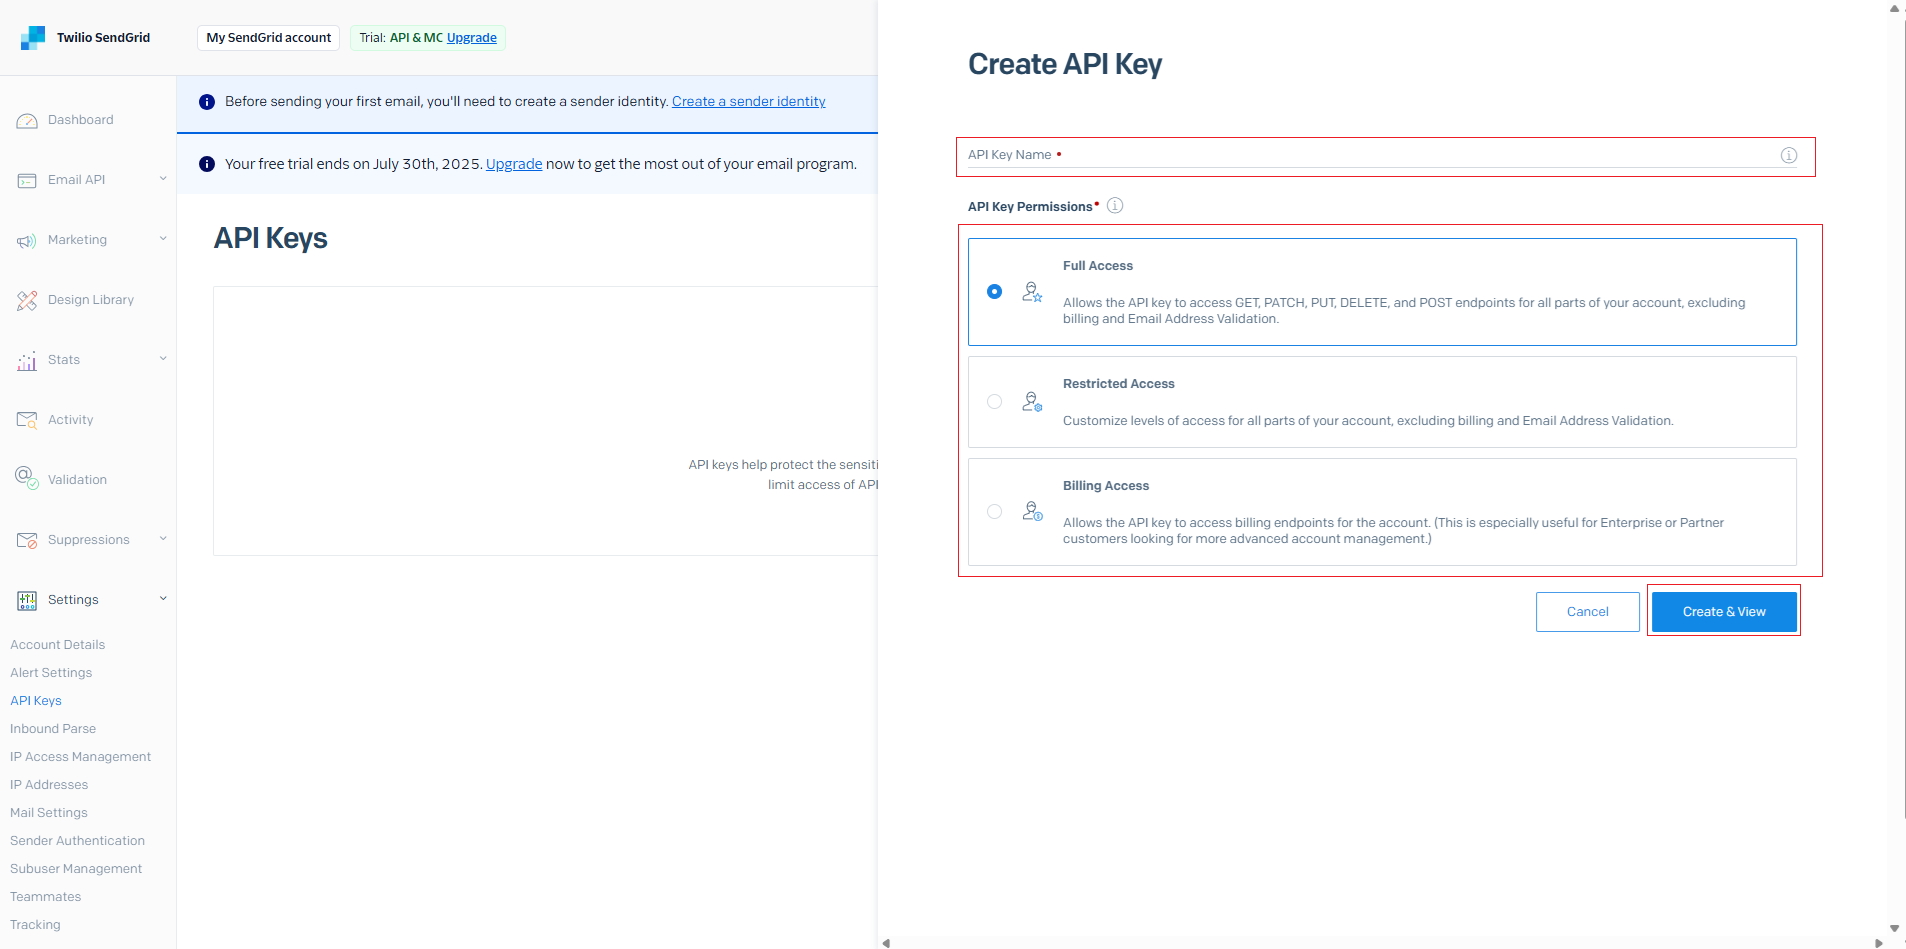
Configure API key permissions
- The API Key has been created successfully. Save this API key in a secure location for later use.
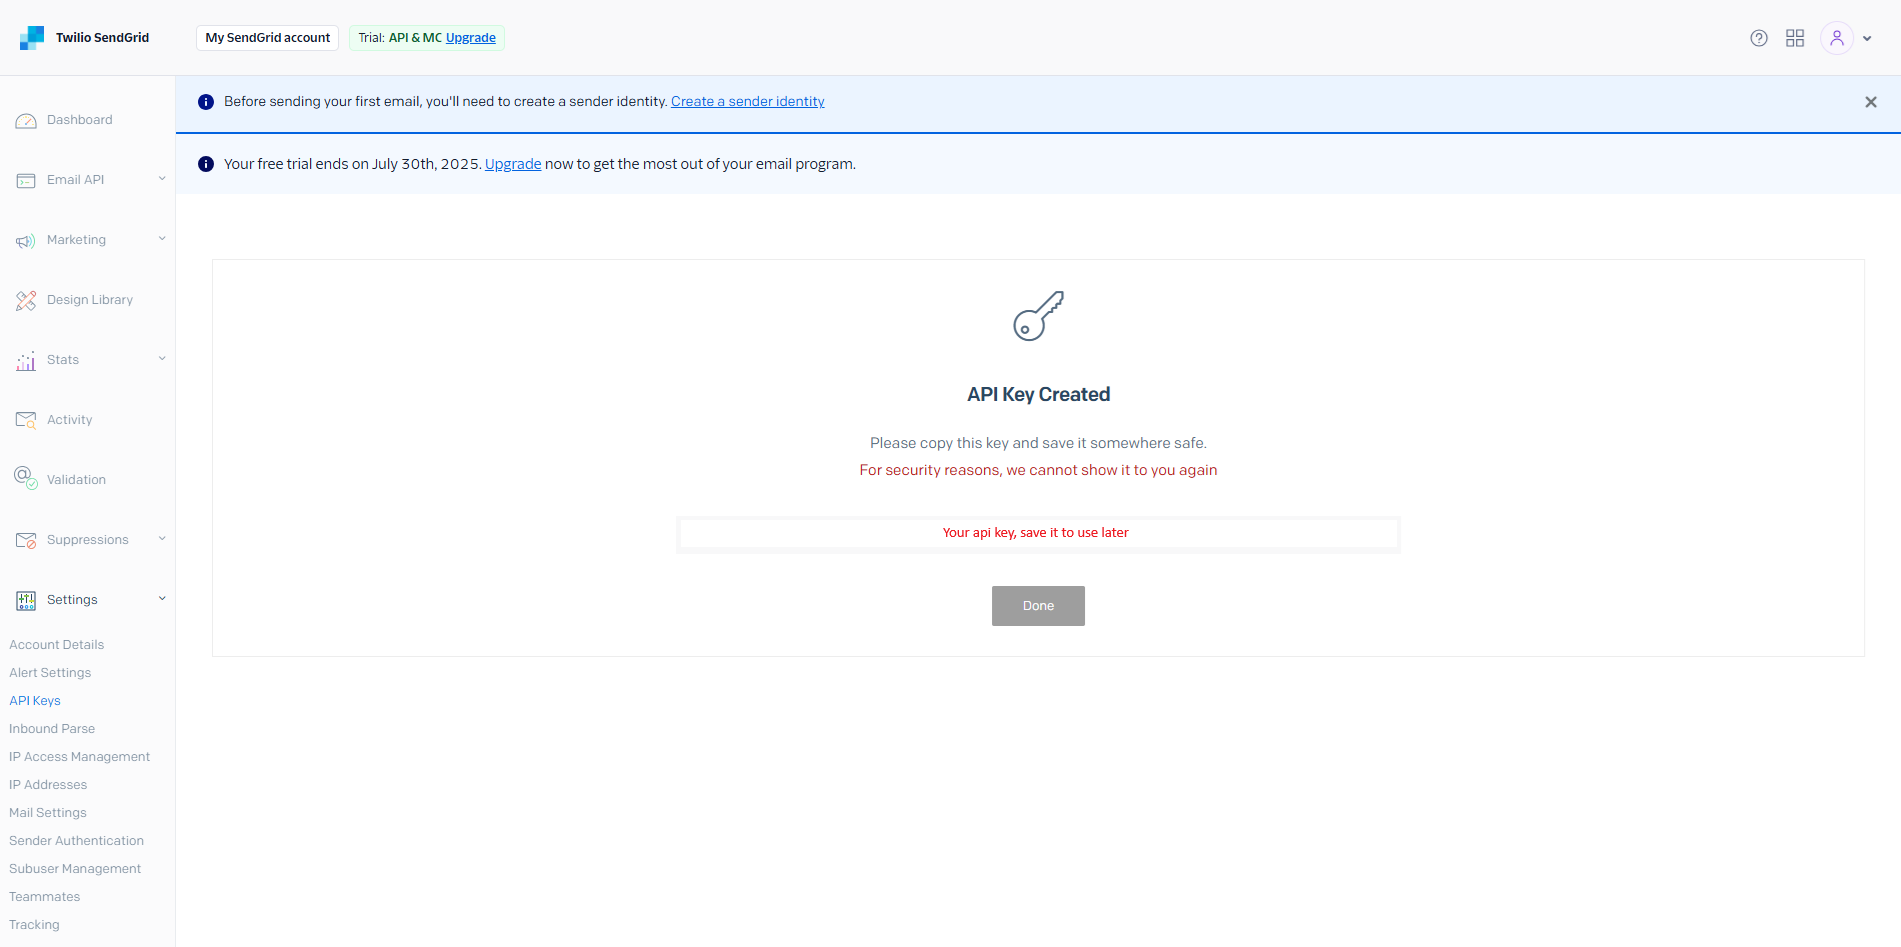
Save API key
- On the Jarvis Helpdesk page, go to the App Integration section and click to add Sendgrid to your organization's applications.
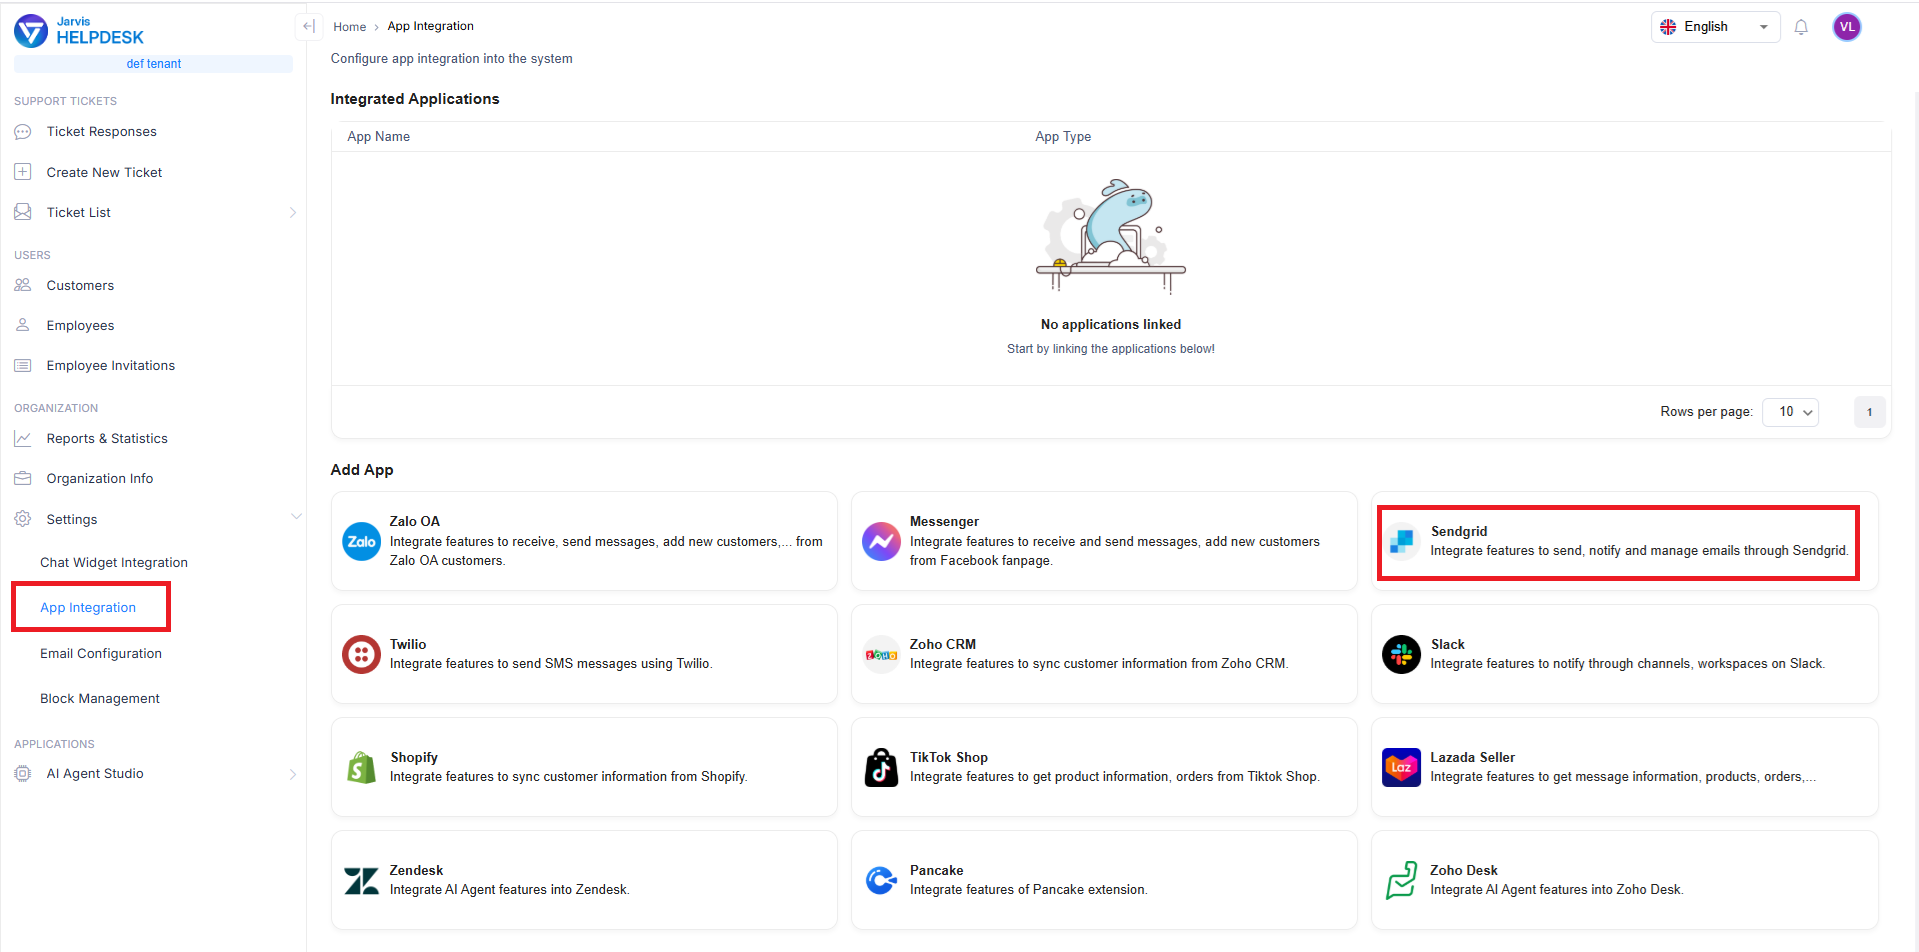
Add Sendgrid integration
- Enter the API key you created earlier, then click Confirm
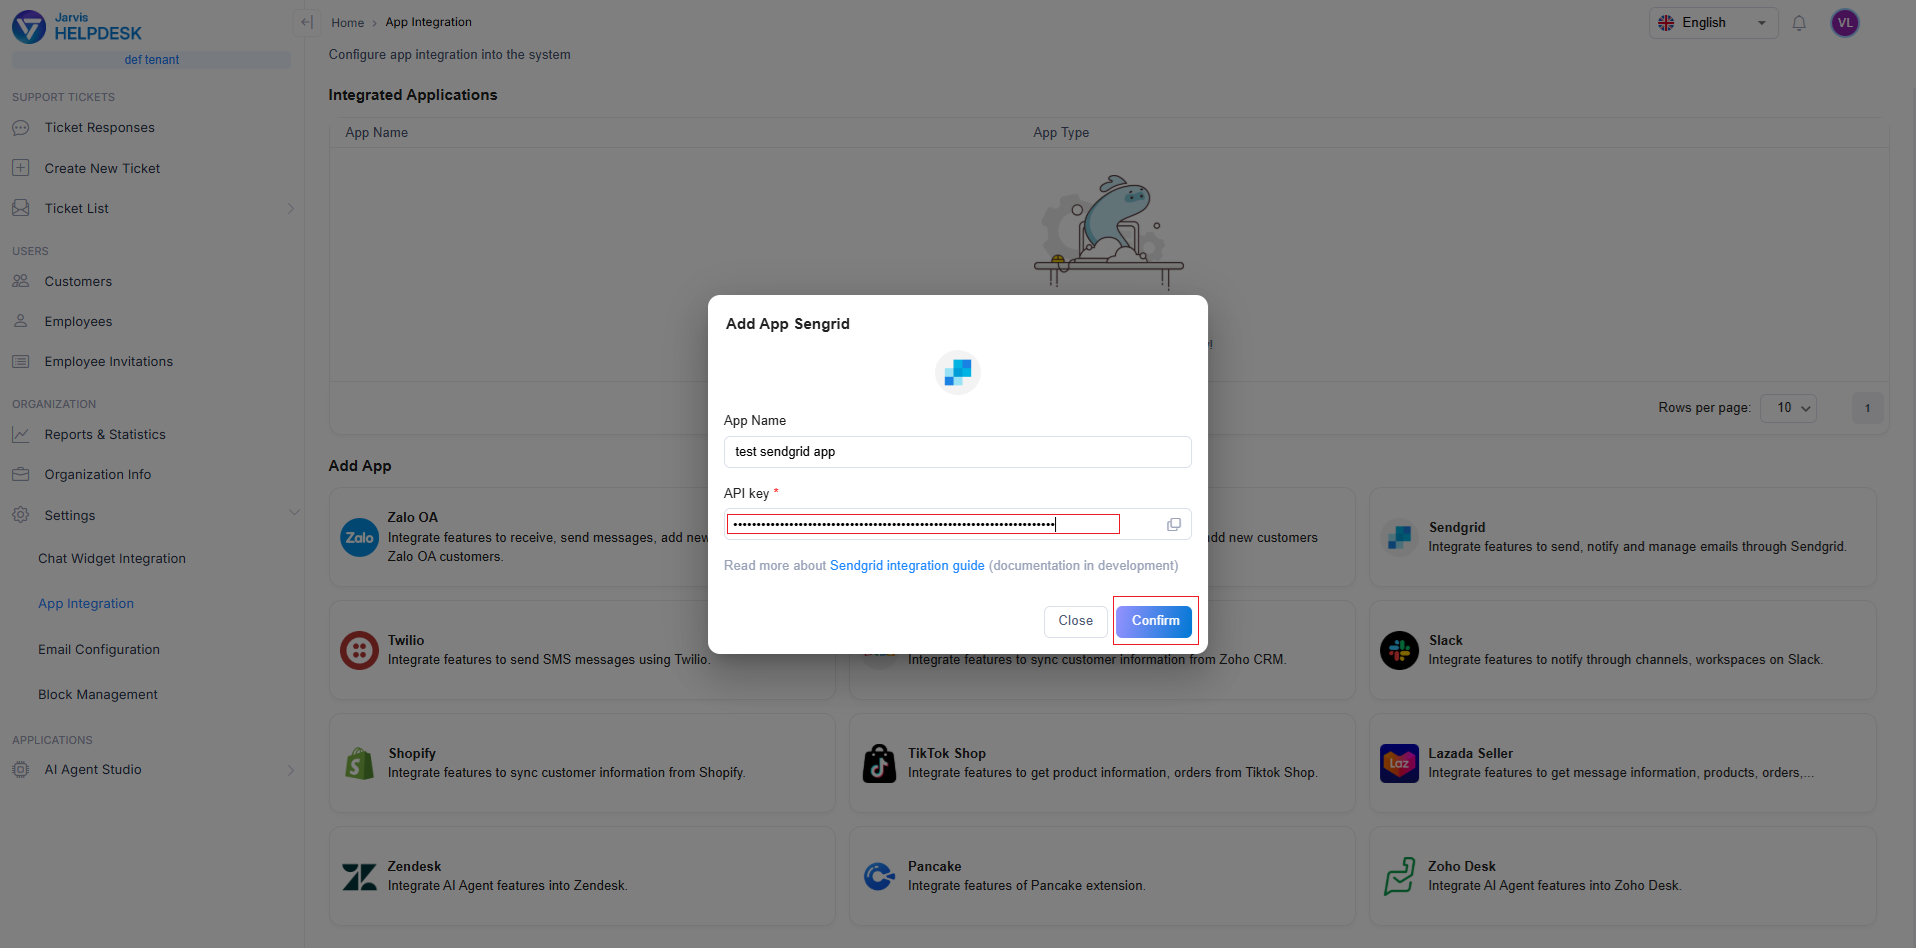
Configure Sendgrid API key
- The system will notify you of successful integration and redirect you to the newly integrated application page.
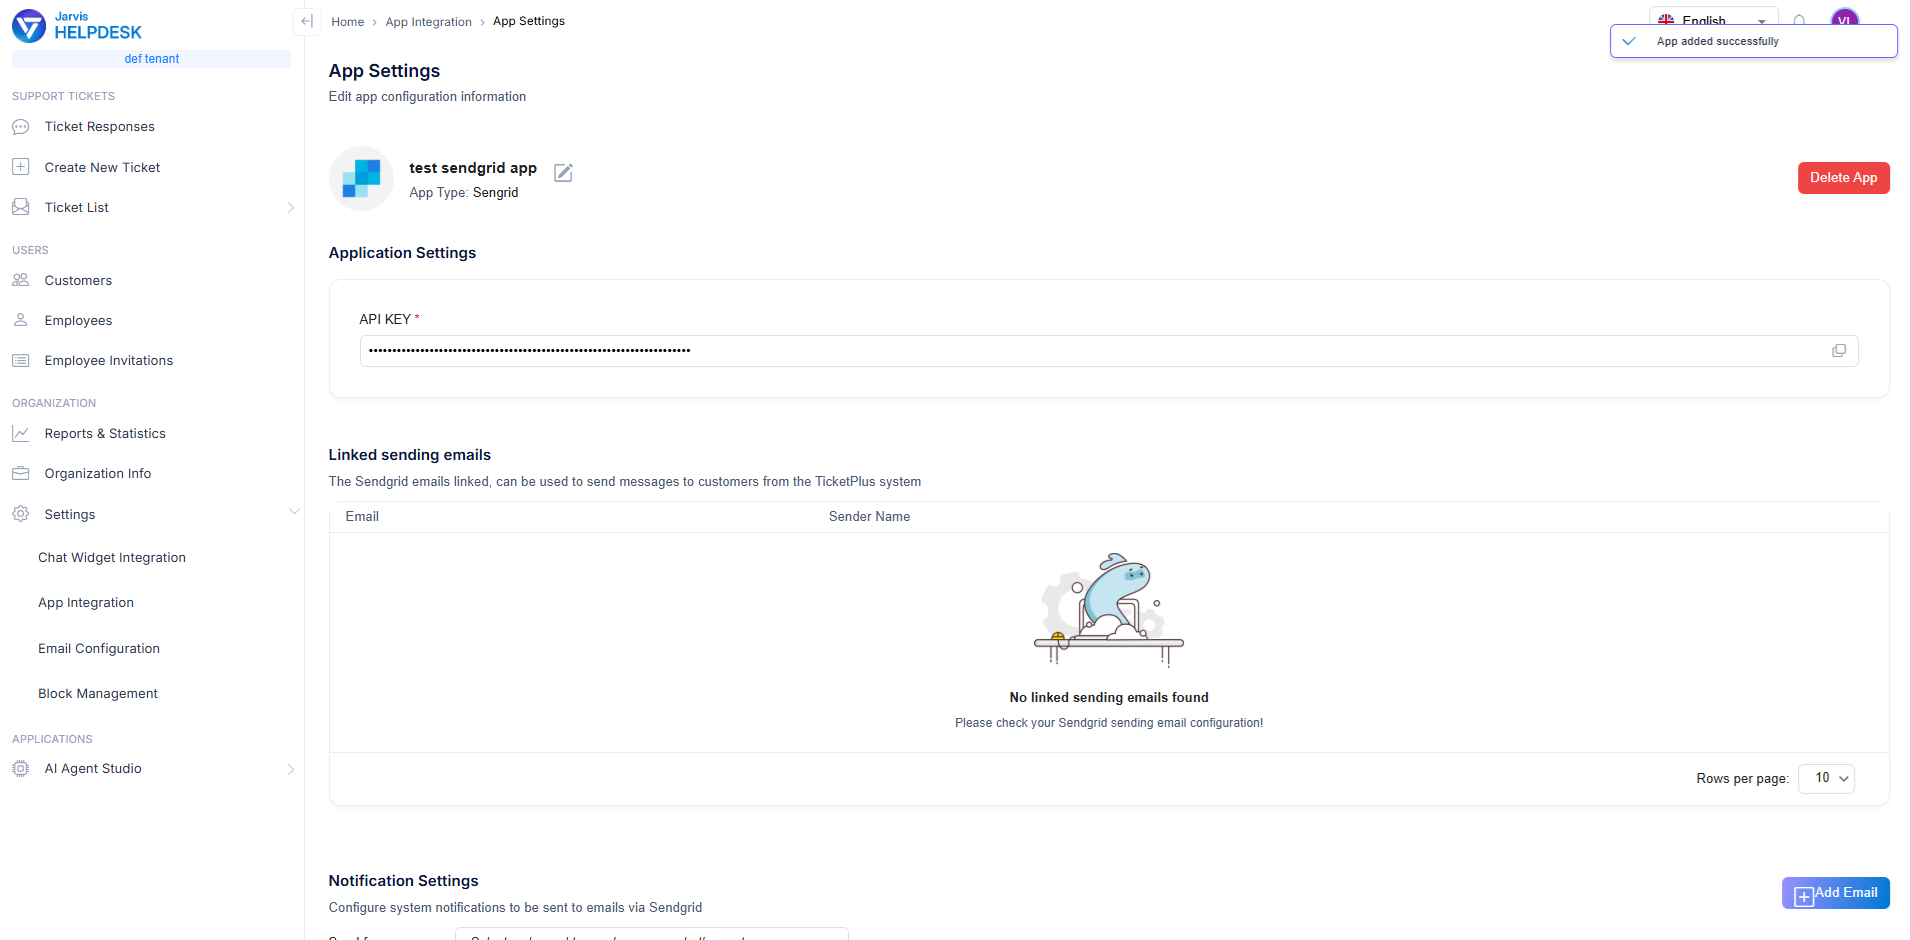
Integration success
Common Issues
Empty Sender List
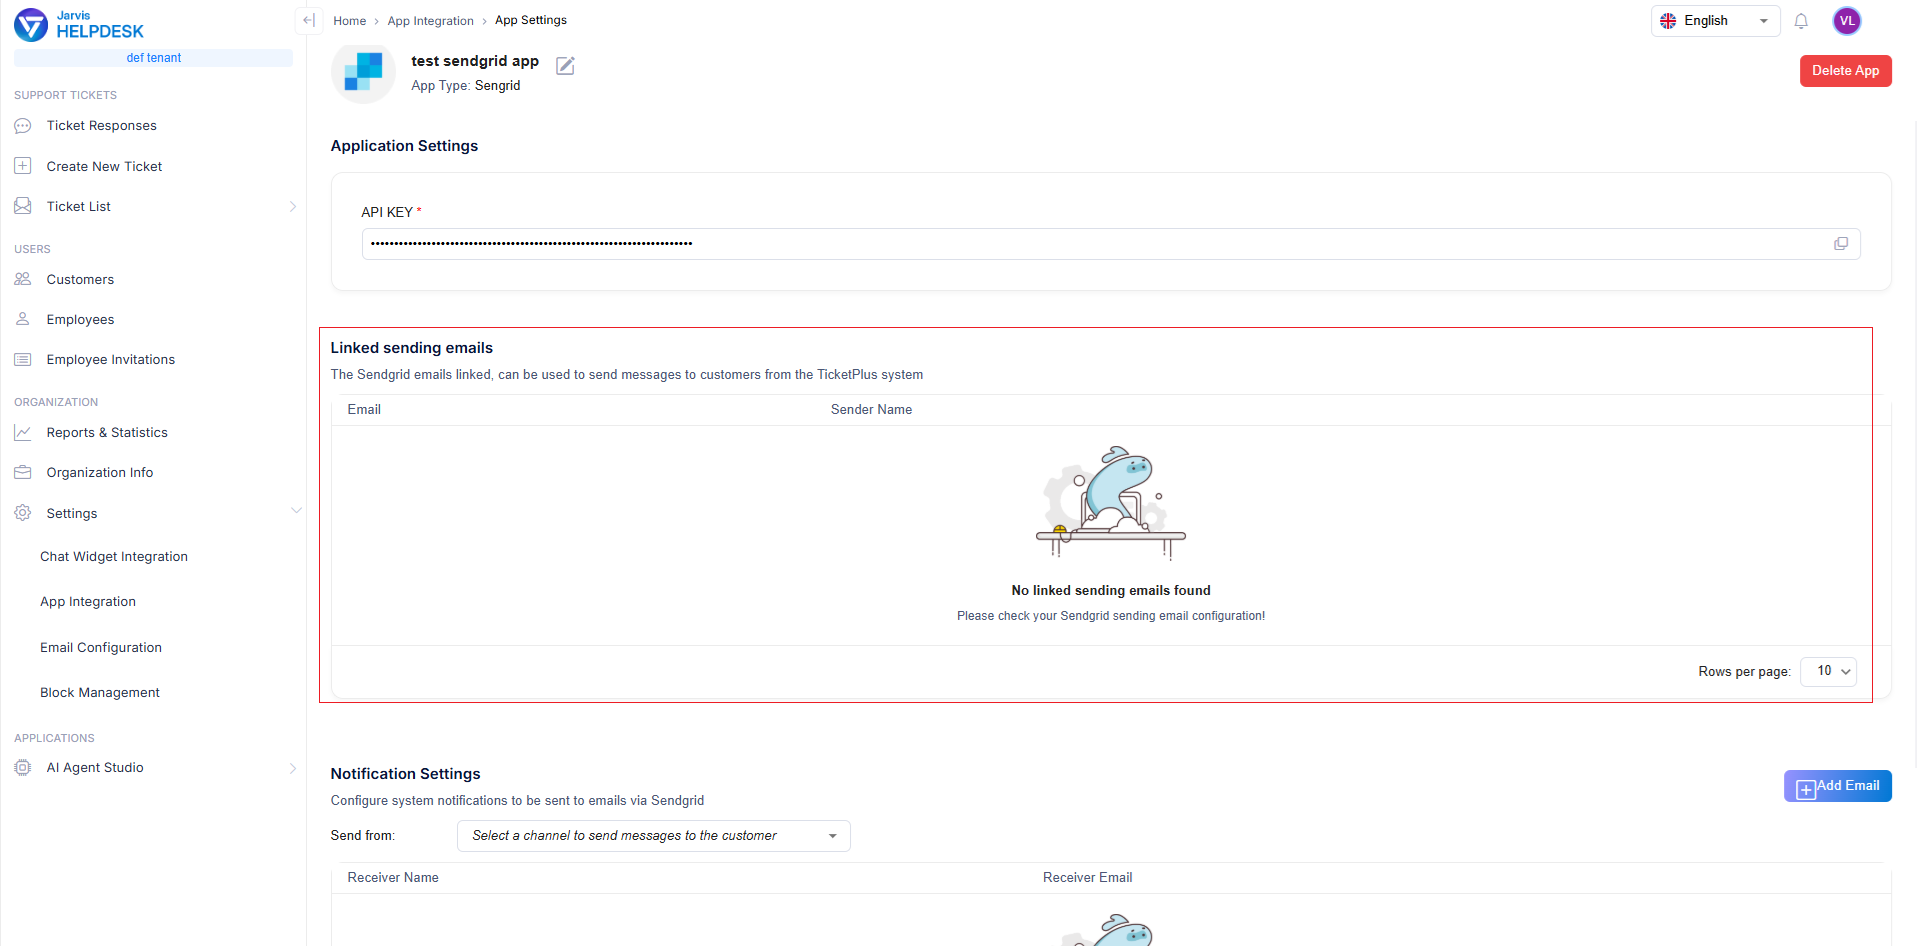
Empty sender list
This occurs when you haven't configured an email sender in Sendgrid. To configure a sender in Sendgrid, follow these steps:
- On the Sendgrid homepage, go to Marketing in the left navigation bar, select Senders, then click Create New Sender
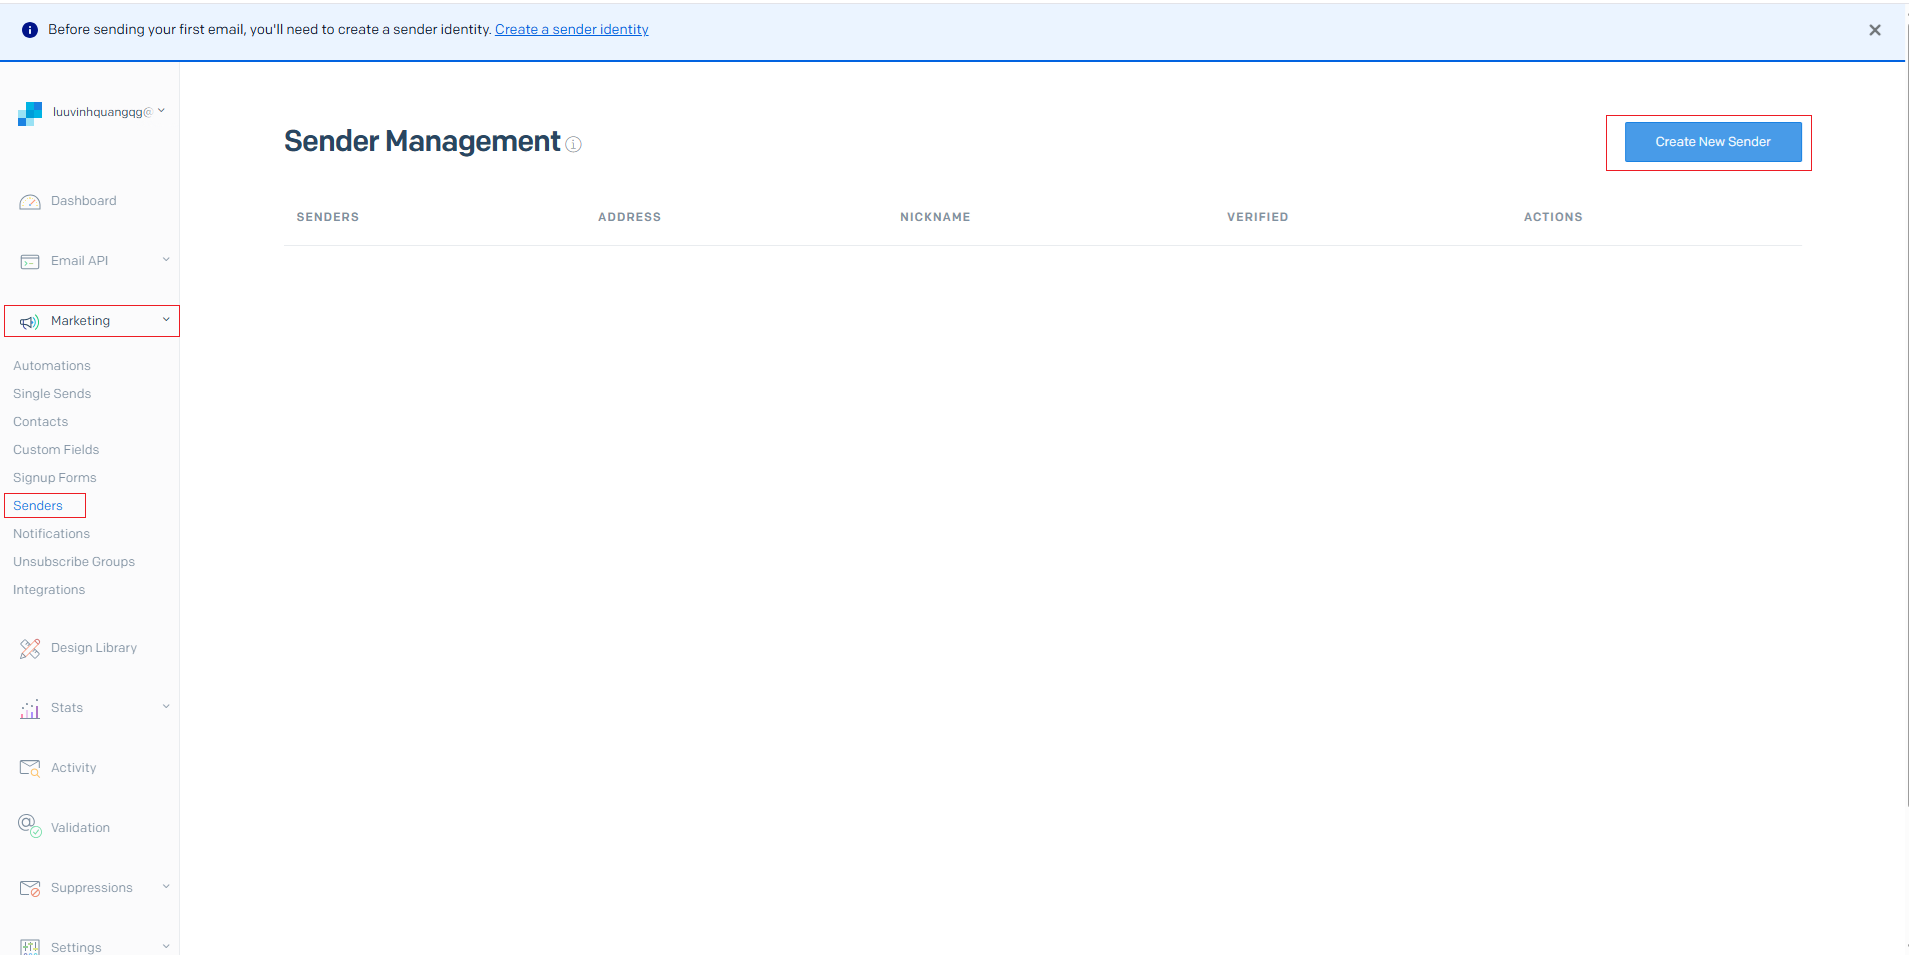
Create new sender
- Enter the information about the email you will use. (*Note: "From" refers to the email address that recipients will see as the sender, while "Reply" specifies the email address that recipients will reply to when they click "Reply" on the email)
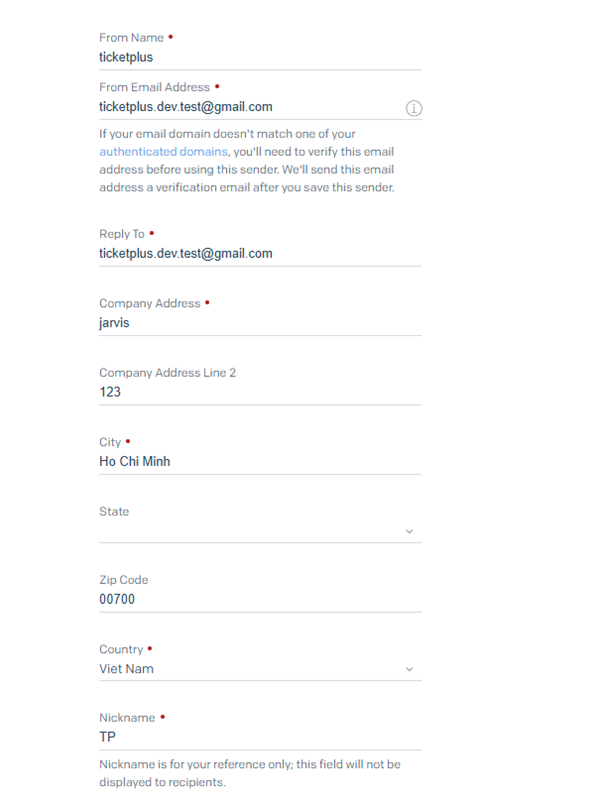
Configure sender information
-
Verify your email sender
-
Return to Jarvis Helpdesk and refresh the page. You will see the sender list displayed.
Note: Make sure you have configured the correct API key and sender information to ensure full functionality of the integration.