Welcome to the Email Configuration section of Jarvis Helpdesk! On this page, you will find detailed instructions on how to integrate and configure email to send and receive notifications from the system.
SMTP Integration
Step 1: Go to the Email Configuration section and select Add email in the sending configuration.
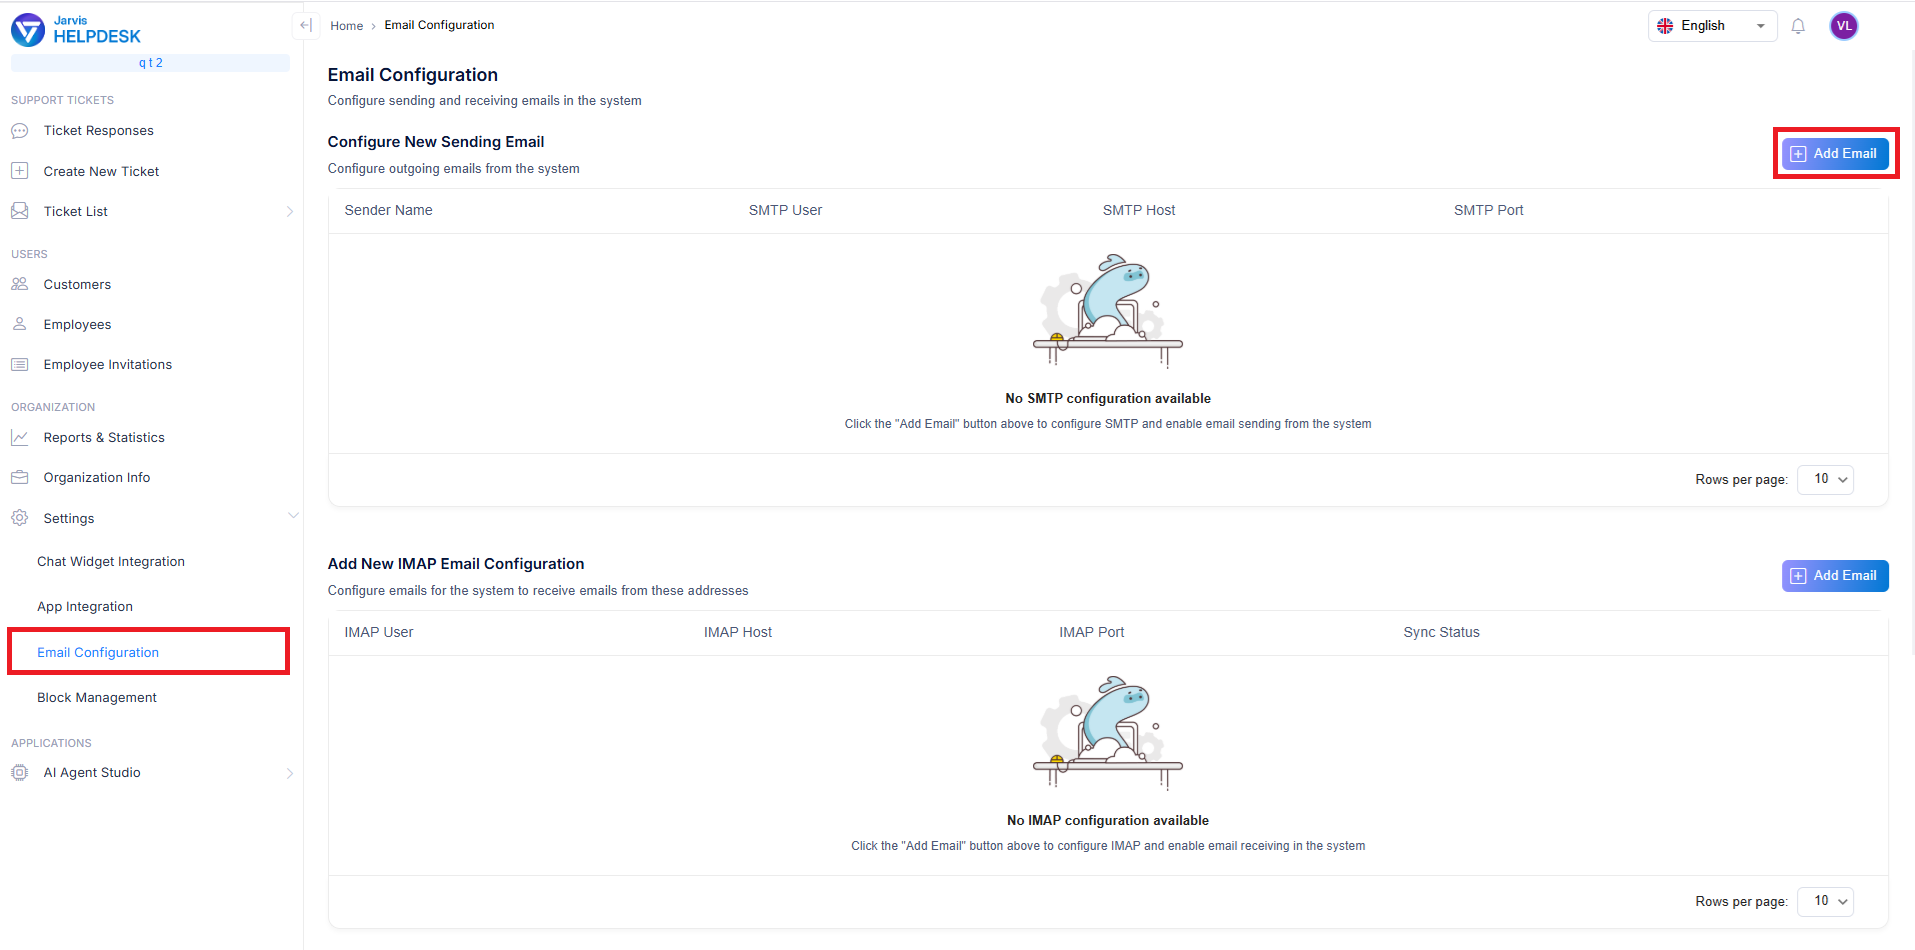
Add sending email configuration
Step 2: Enter the required information:
- Sender Name: name of the email displayed to customers
- Test Email Address: address to receive test email when saving settings
- SMTP config:
- SMTP User: sending email address
- SMTP Password: application password of sending email
- SMTP Host: SMTP server address (e.g., smtp.gmail.com)
- SMTP Port: port for SMTP server communication (usually 587)

Configure SMTP information
Step 3: After clicking confirm and successful integration, the account will be displayed as follows. Admin can click settings to modify SMTP configuration or delete this SMTP configuration.
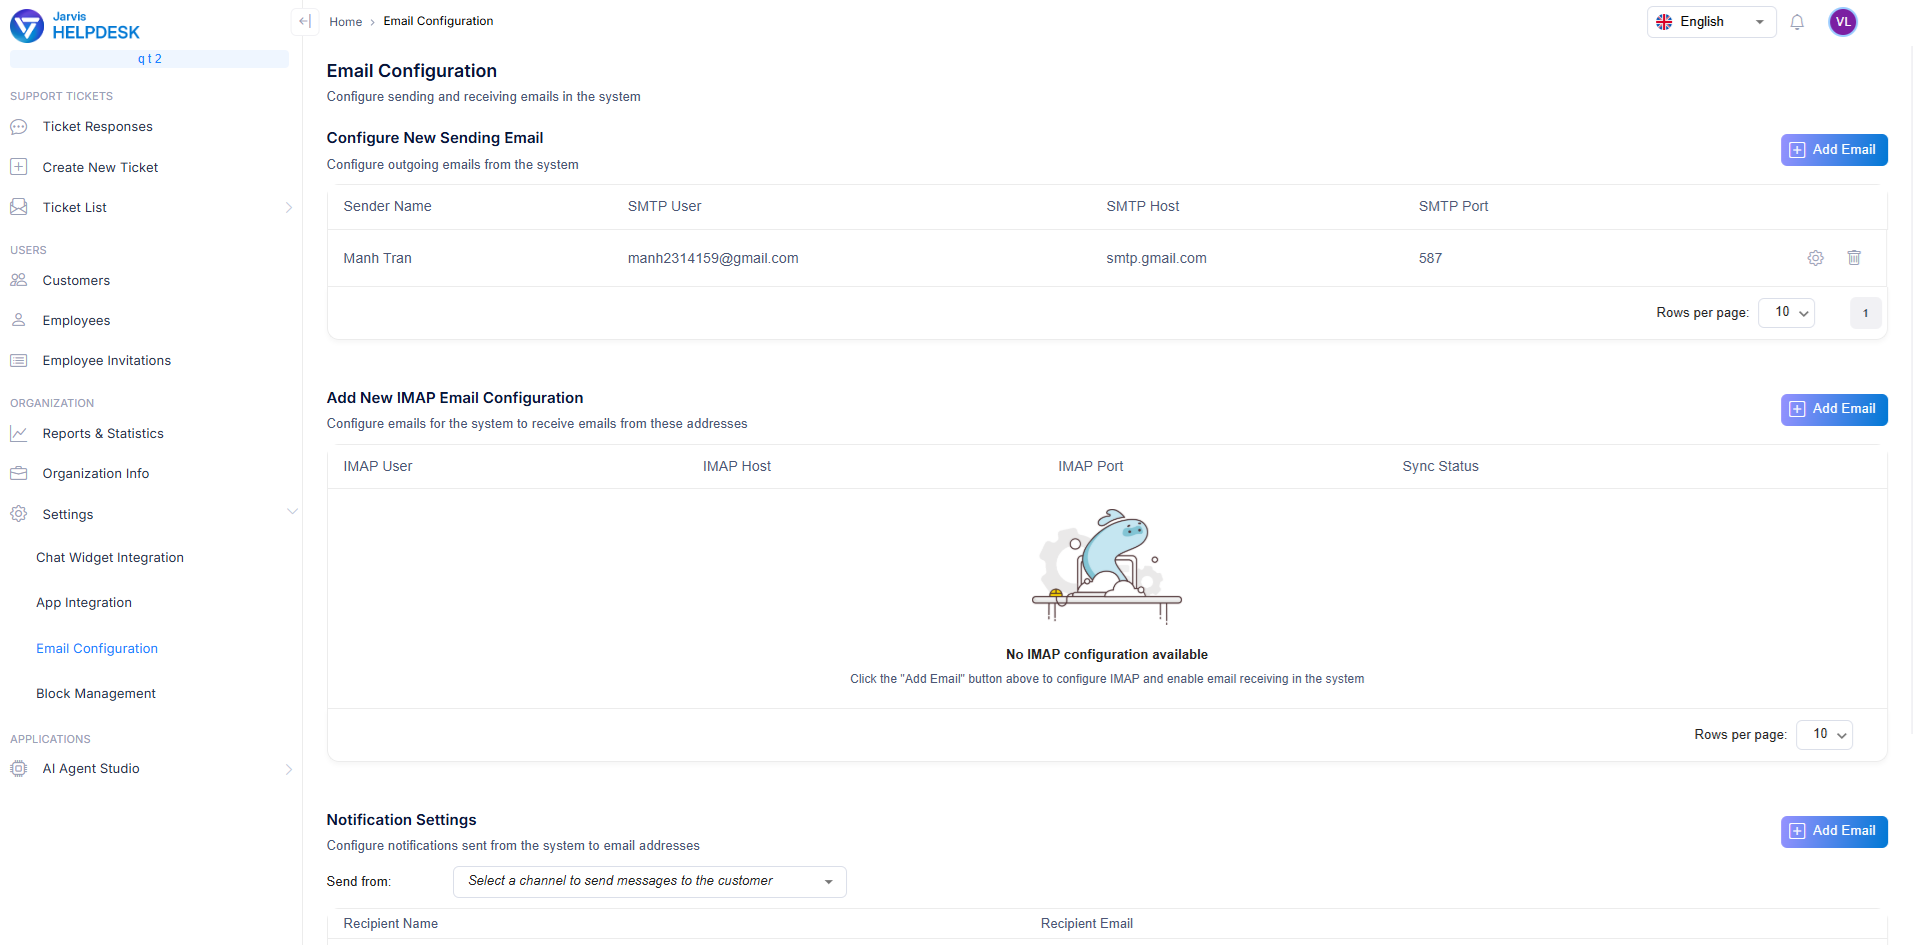
Manage SMTP configuration
IMAP Integration
Before integration, ensure IMAP is enabled. Here's an example on Gmail platform:
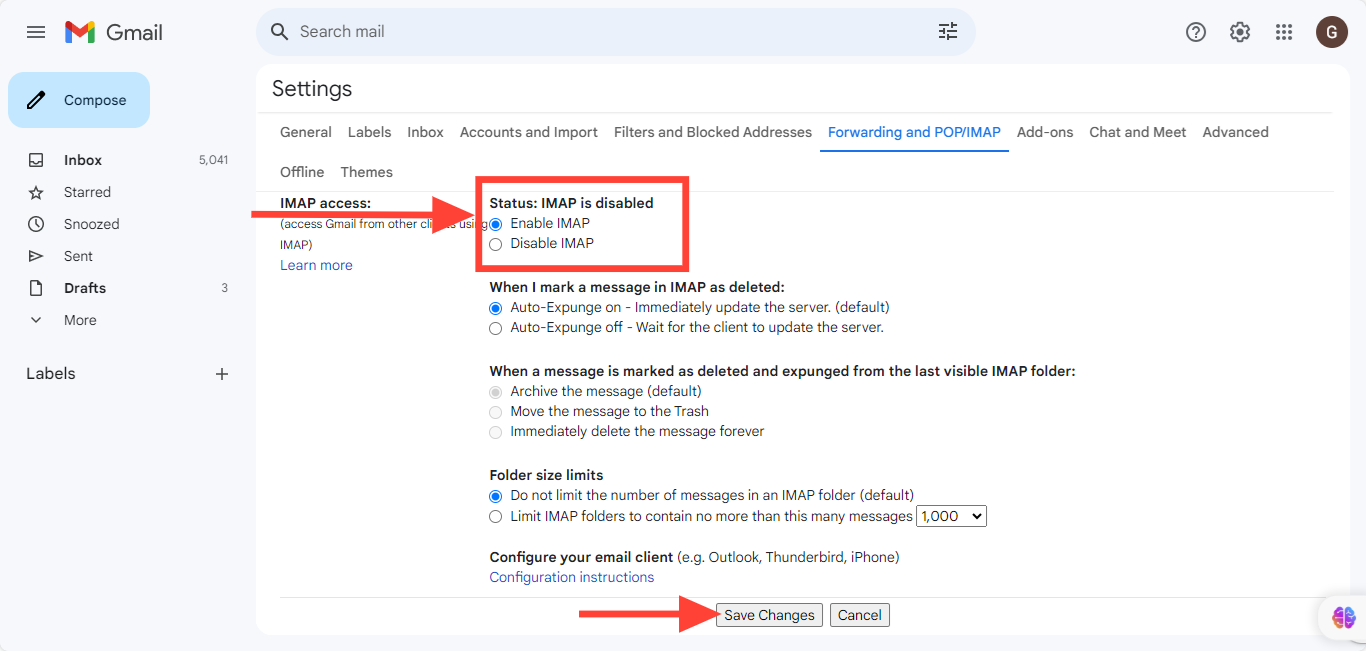
Enable IMAP on Gmail
Step 1: Go to the Email Configuration section and select Add email in the receiving configuration.
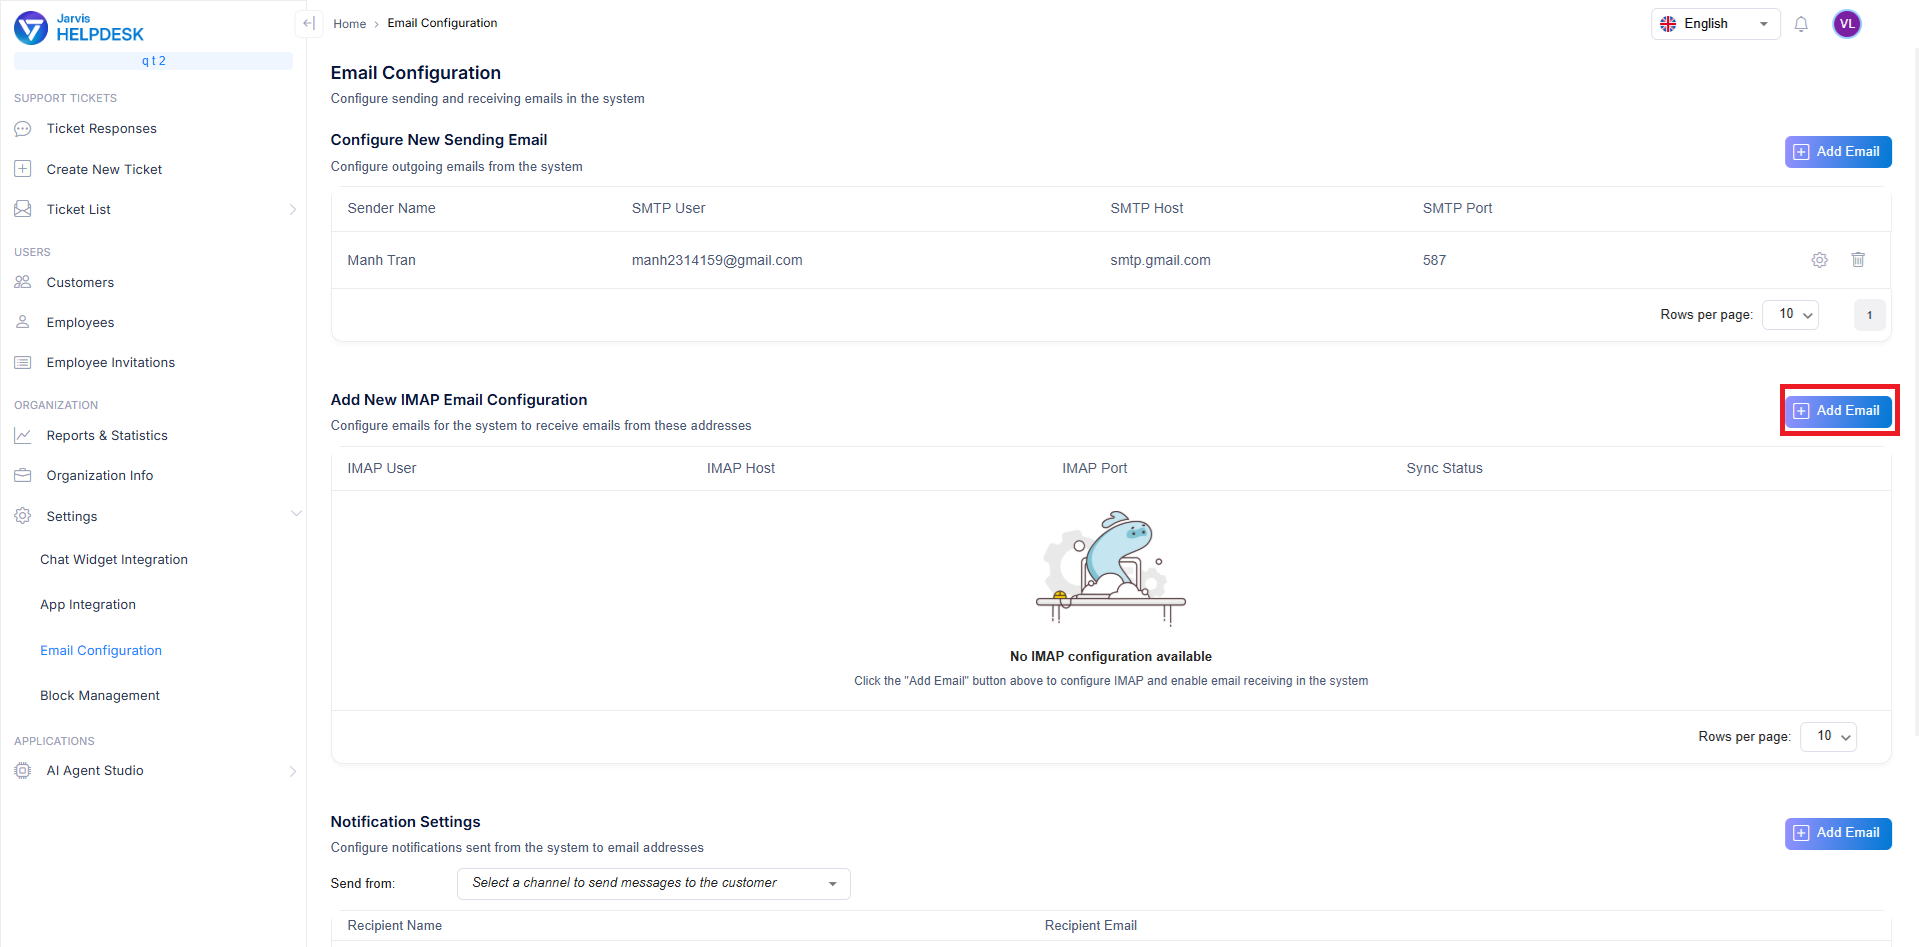
Add receiving email configuration
Step 2: Enter the required information:
- IMAP User: receiving email address
- IMAP Password: application password of receiving email
- IMAP Host: IMAP server address (e.g., imap.gmail.com)
- IMAP Port: port for IMAP server communication (usually 993)
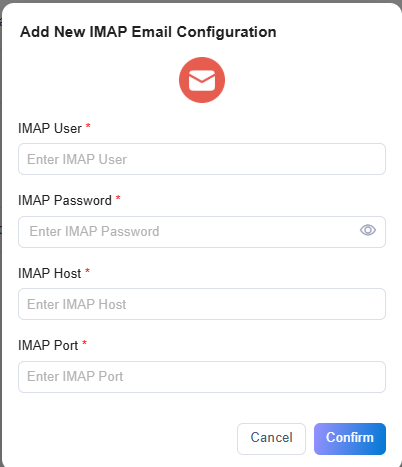
Configure IMAP information
Step 3: After clicking confirm and successful integration, the account will be displayed as follows. Admin can click settings to modify IMAP configuration or delete this IMAP configuration.
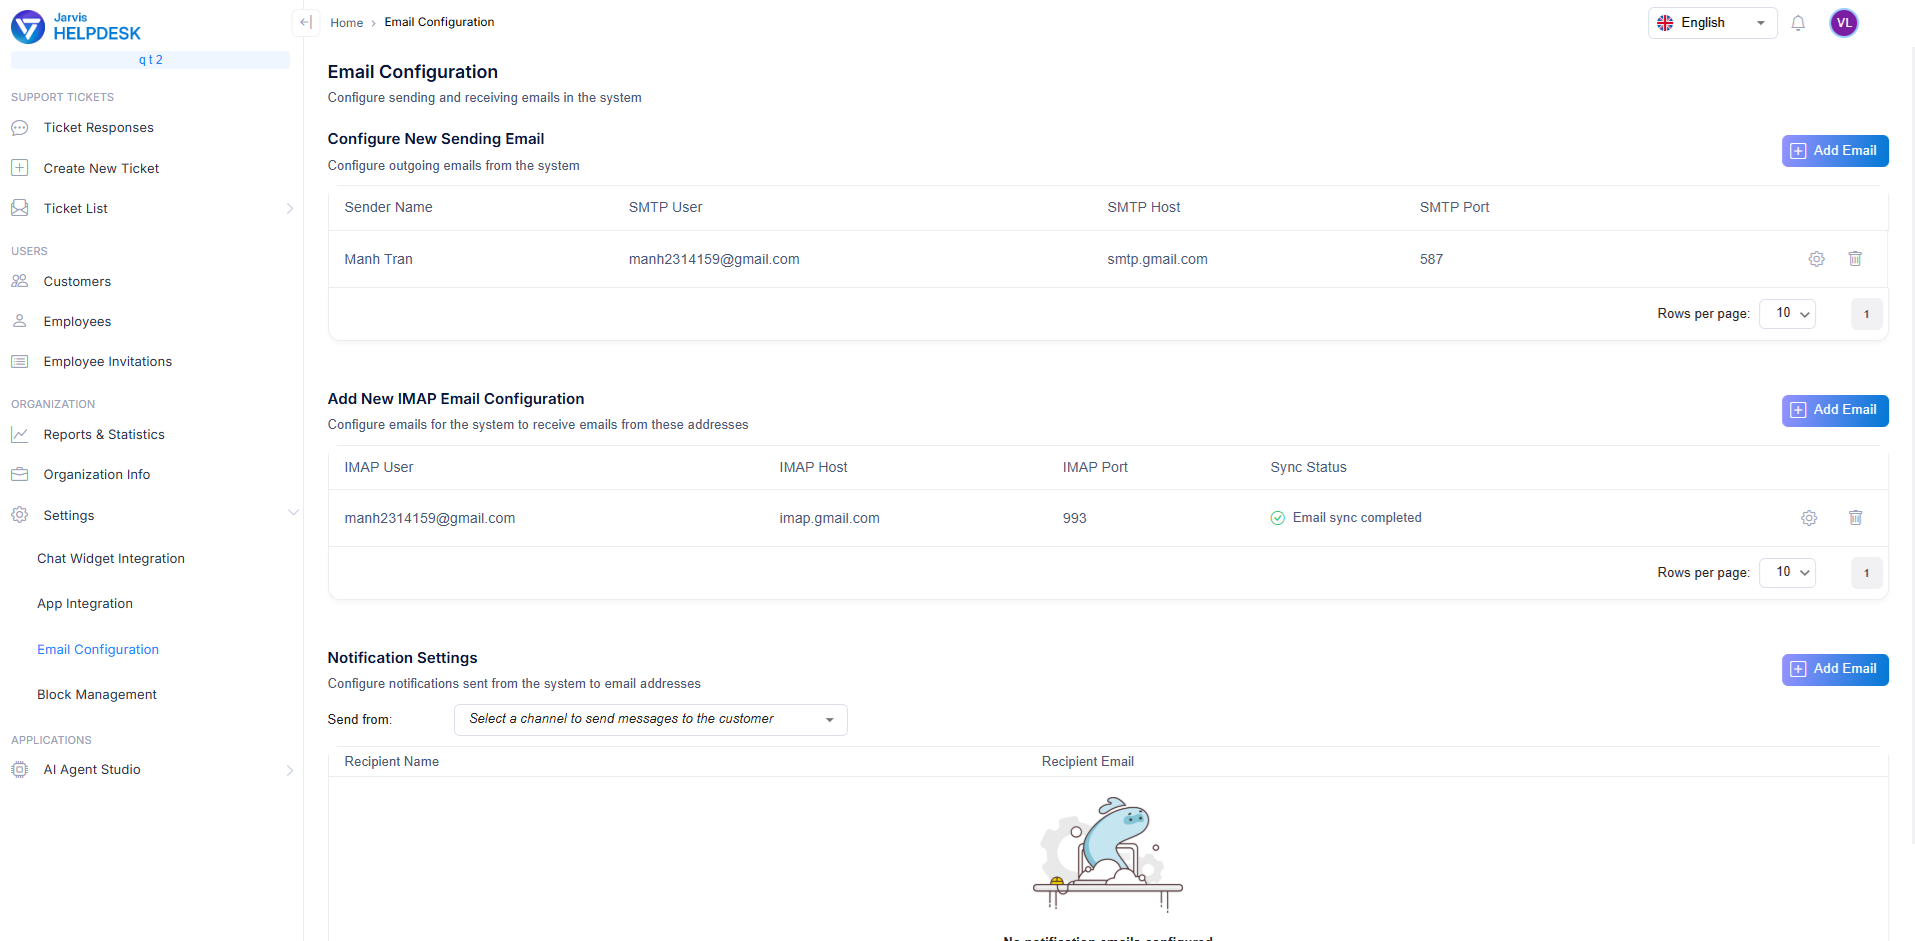
Manage IMAP configuration
Note: Ensure you have configured the correct SMTP and IMAP information for the system to send and receive emails accurately.