Zalo
Welcome to the Zalo Integration section of Jarvis Helpdesk! This guide will walk you through the process of integrating Zalo OA (Official Account) with the Jarvis Helpdesk system.
Introduction
To integrate Zalo OA with the Jarvis Helpdesk system, you need to add Zalo OA to your organization's applications through the Integration section.
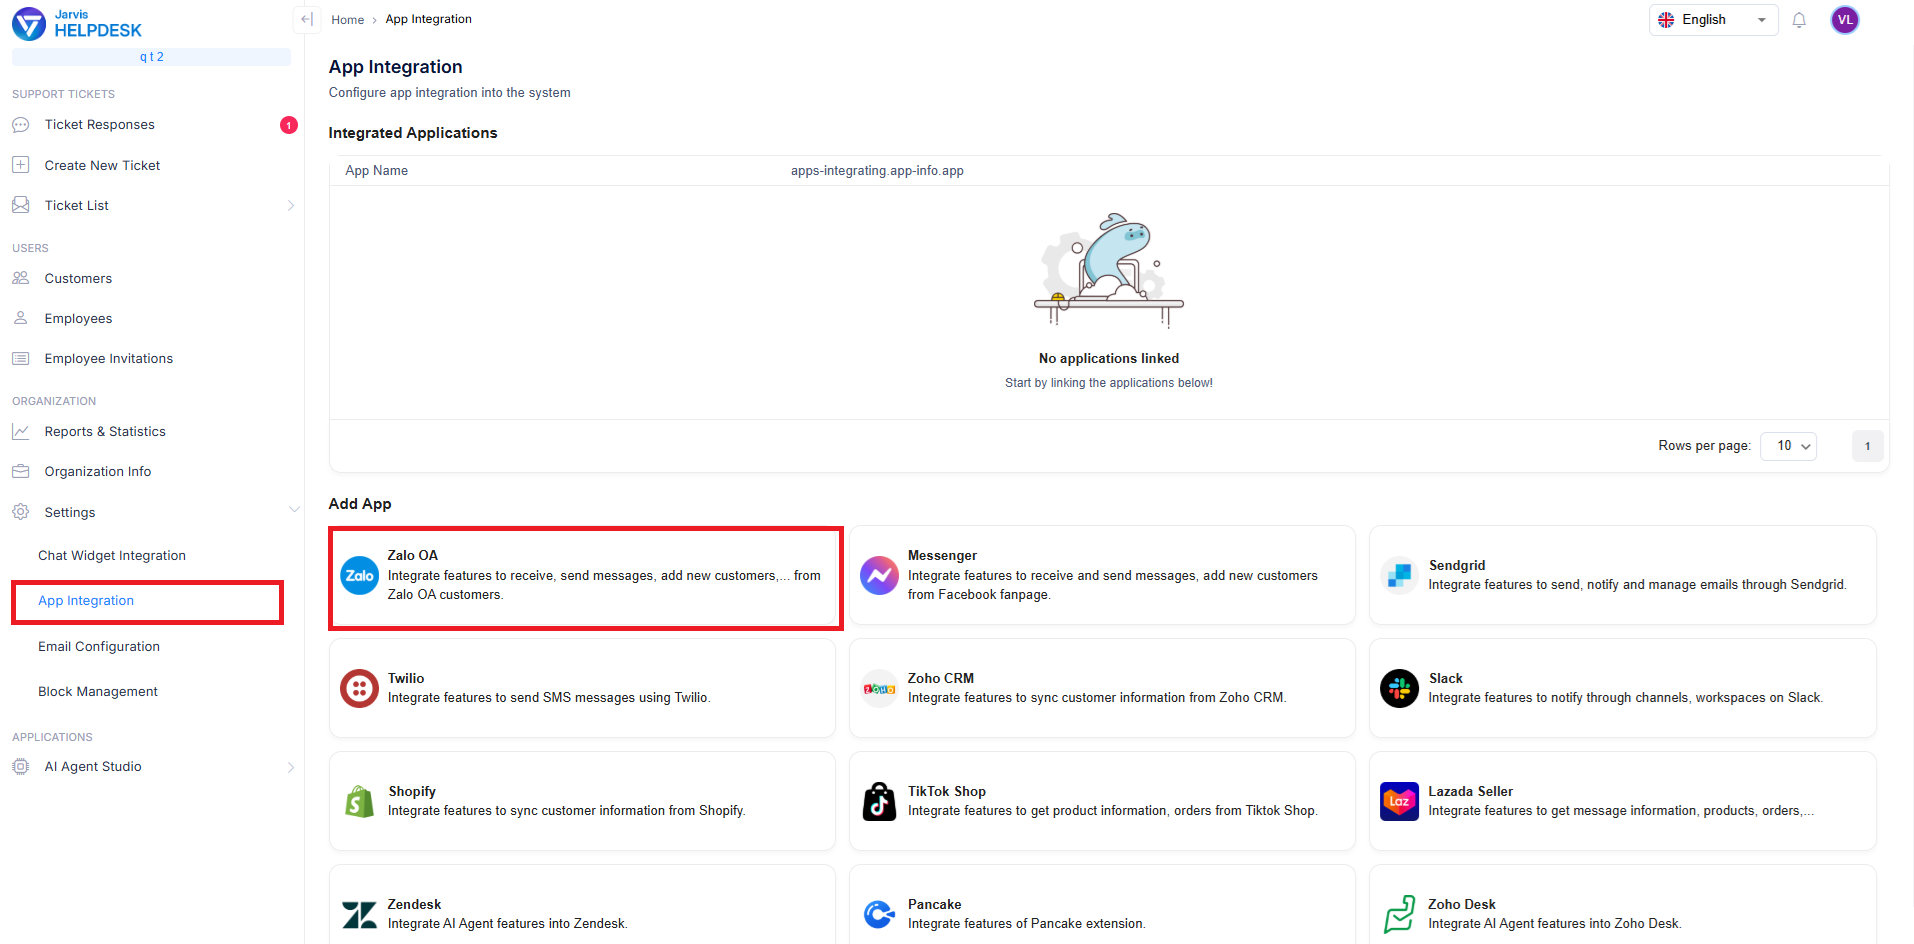
Add Zalo OA integration
You will need to provide the system with your Zalo App ID, App Secret Key, and Application Name (which you can customize as desired).
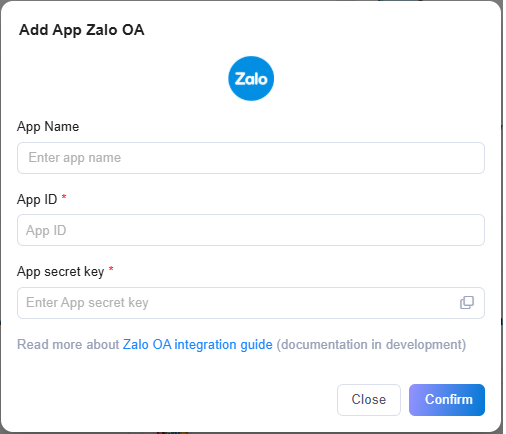
Configure Zalo app information
To obtain the App ID and App Secret Key, you need to create a Zalo app on the Zalo developer platform and verify the domain for webhook helpdesk-api.dev.jarvis.cx to receive notifications from OA to the Jarvis Helpdesk system. The detailed process is described below.
Creating a Zalo App
-
Visit https://developers.zalo.me/ to access the Zalo developer website. Click the Login button in the top right corner to sign in.
-
Navigate to https://developers.zalo.me/apps to create a new app. The interface will look like this:
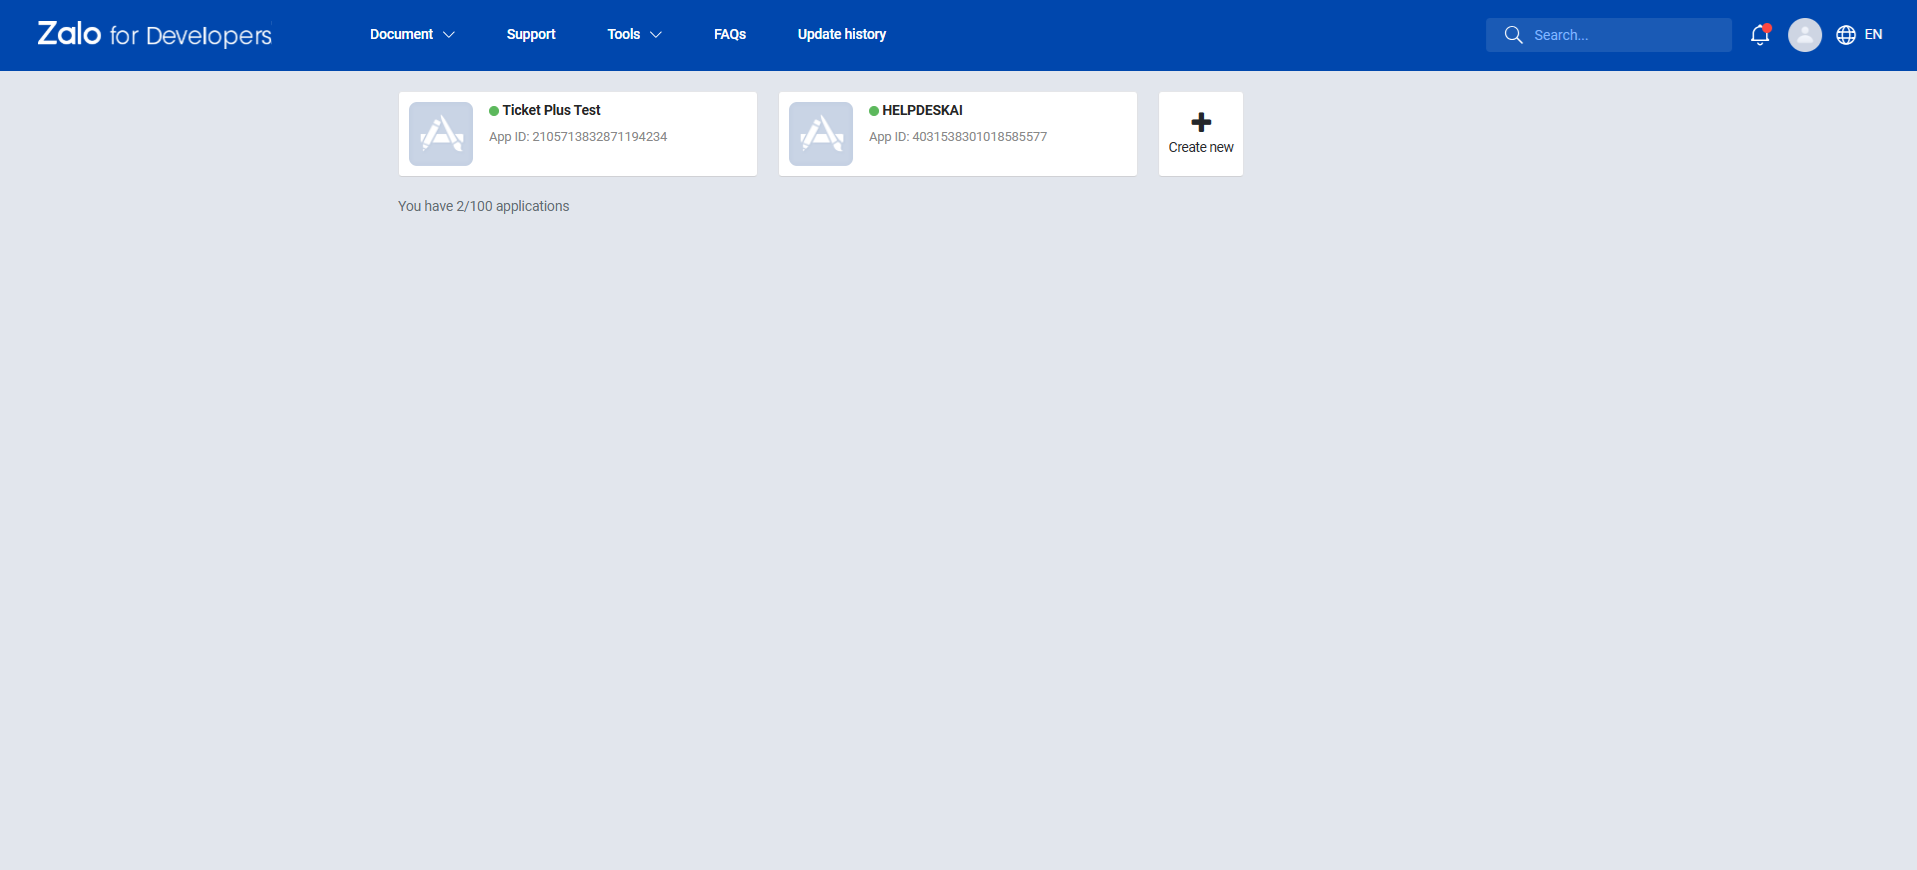
Zalo developer apps page
- Click Create New and fill in the required information including Display Name, Category, and Description. Then click Create App ID to start creating a new application.

Create new Zalo app
- Go to the Domain authentication section in the left sidebar. Here you need to enter the TicketPlus system domain to verify it for your application. This domain will be used as the webhook to receive events from OA. Enter helpdesk-api.jarvis.cx

Domain verification
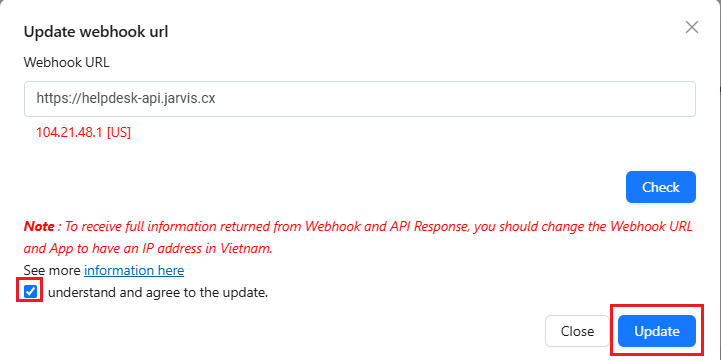
- Navigate to the Webhook section in the left sidebar. Update the webhook value to https://helpdesk-api.jarvis.cx
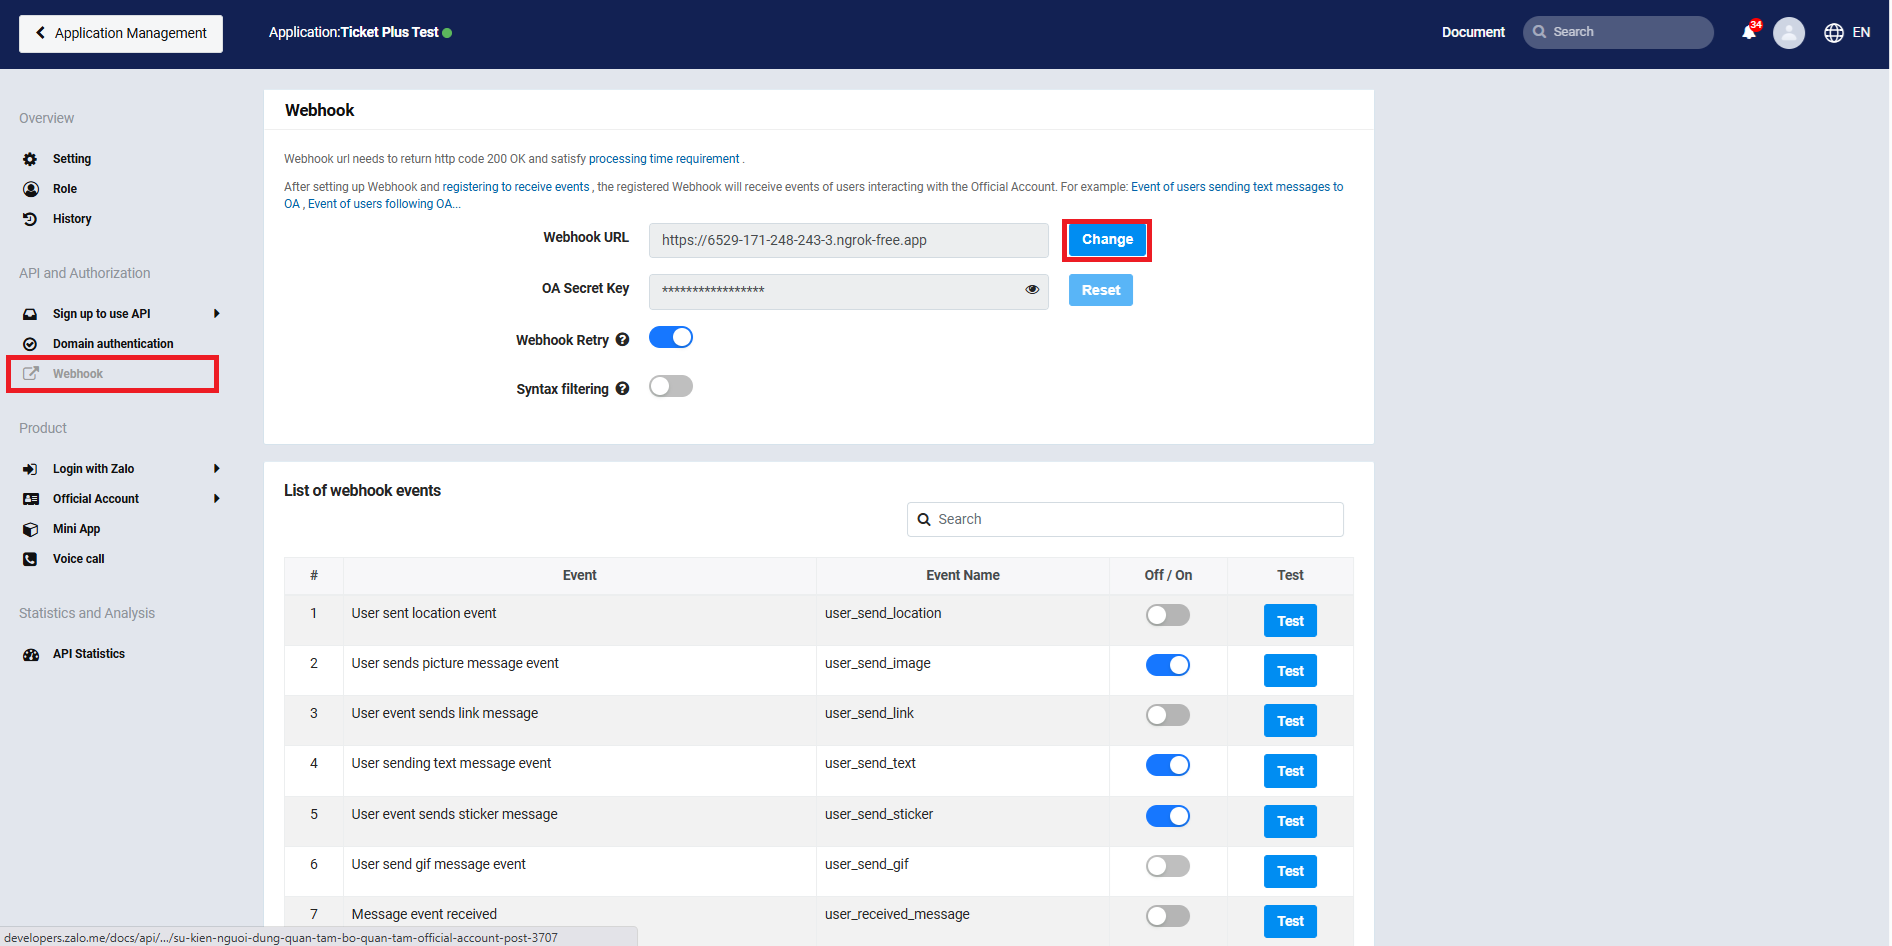
Configure webhook URL
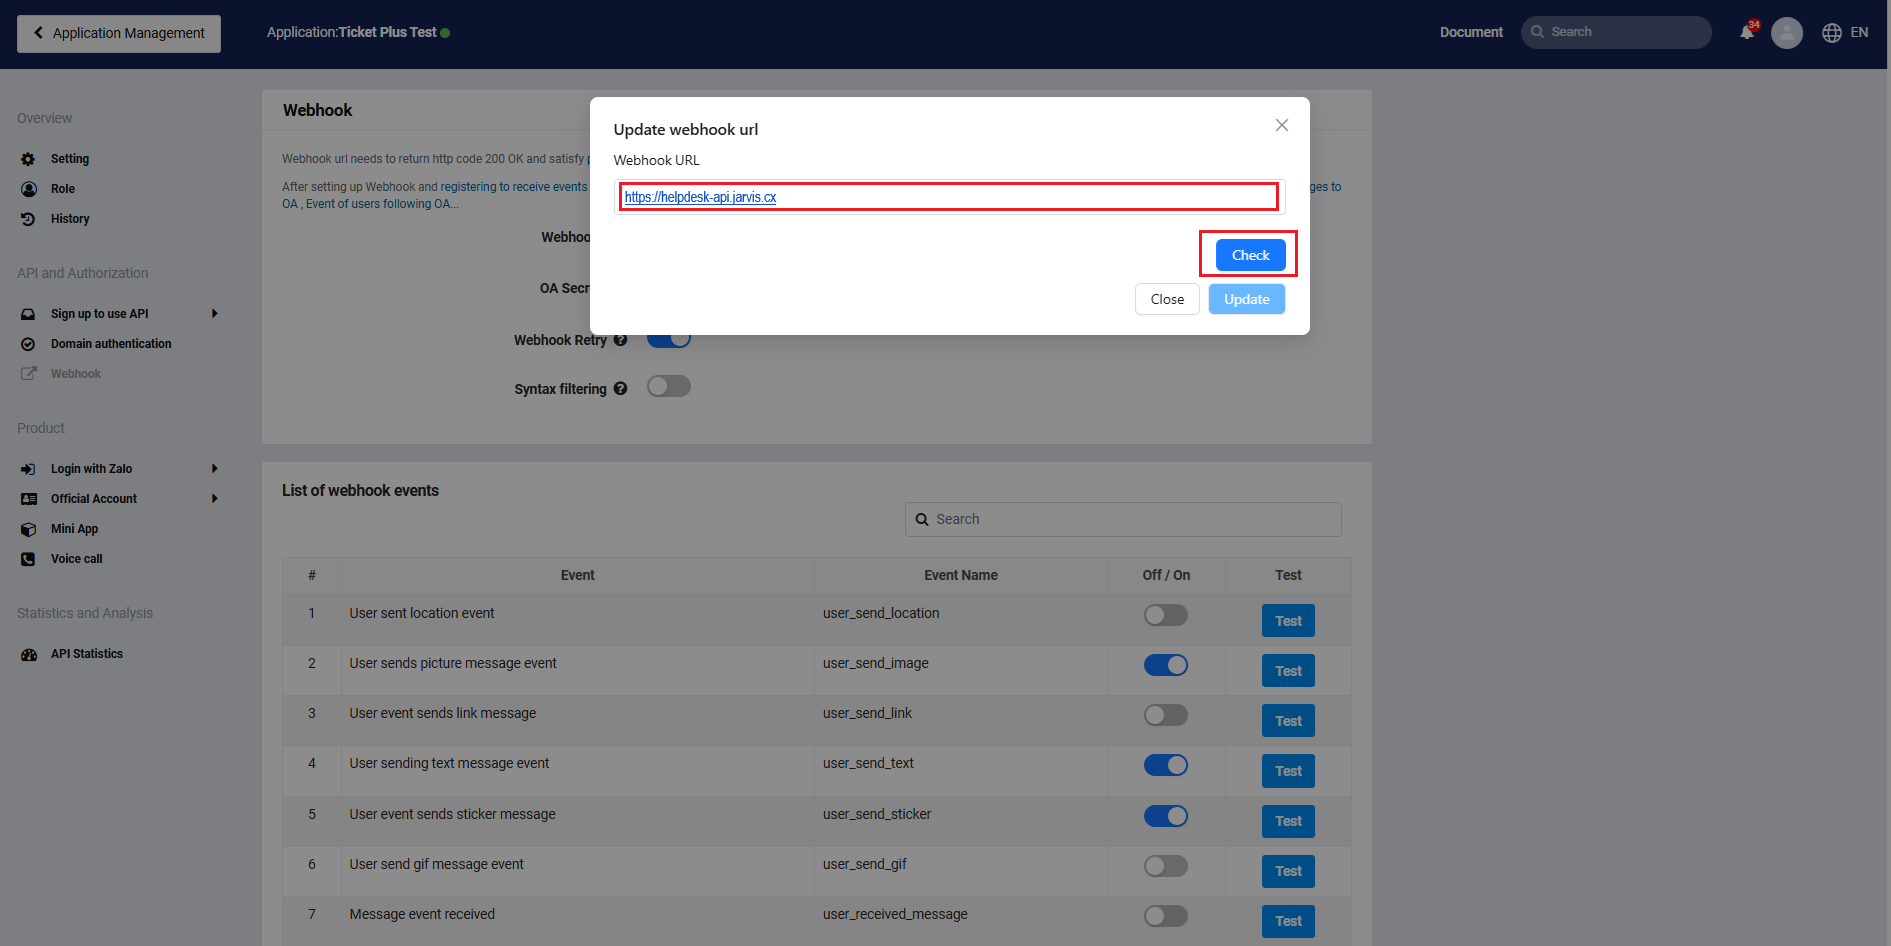
Webhook configuration
Webhook settings
-
Copy the OA Secret Key value and save it somewhere safe. You will need this OA Secret Key later when adding OA to the Jarvis Helpdesk system.
-
In the Webhook section, scroll down to find the List of webhook events. Here you need to enable the following webhook events used in the system:
- user_send_image
- user_send_text
- user_send_sticker
- user_send_audio
- oa_send_text
- oa_send_image
- user_send_video
- user_send_file
- oa_send_file
- user_reacted_message
- oa_reacted_message
- oa_send_sticker
- user_feedback
- change_oa_daily_quota
- change_oa_template_tags
- change_template_quality
- change_template_quota
- event_journey_time_out
- event_journey_acknowledged
- user_received_message
Example:
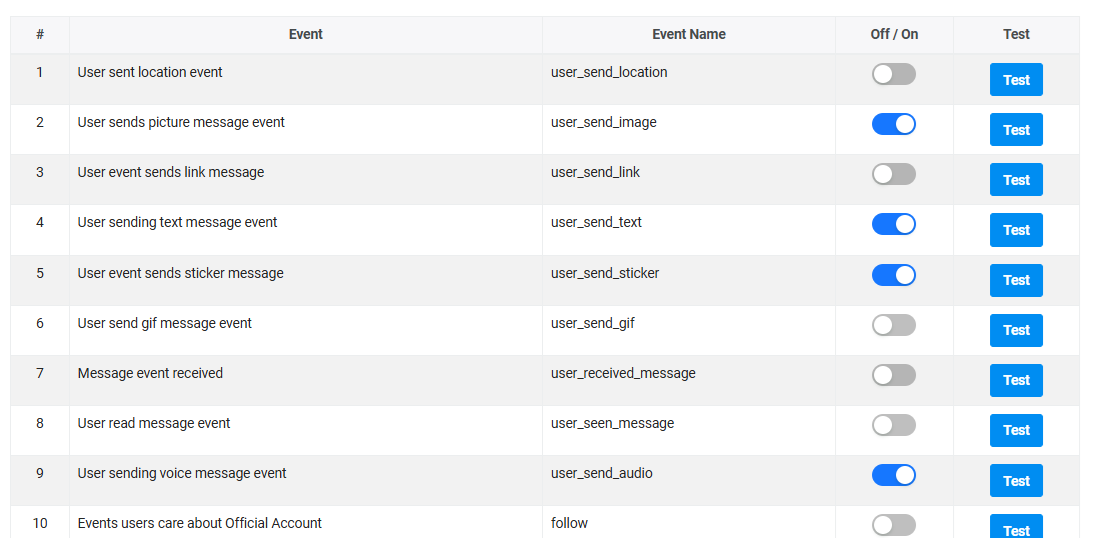
Enable webhook events
- In the General Settings of Official Account, enter https://helpdesk-api.jarvis.cx in the Official Account Callback Url field, then click Update to save the Callback URL.
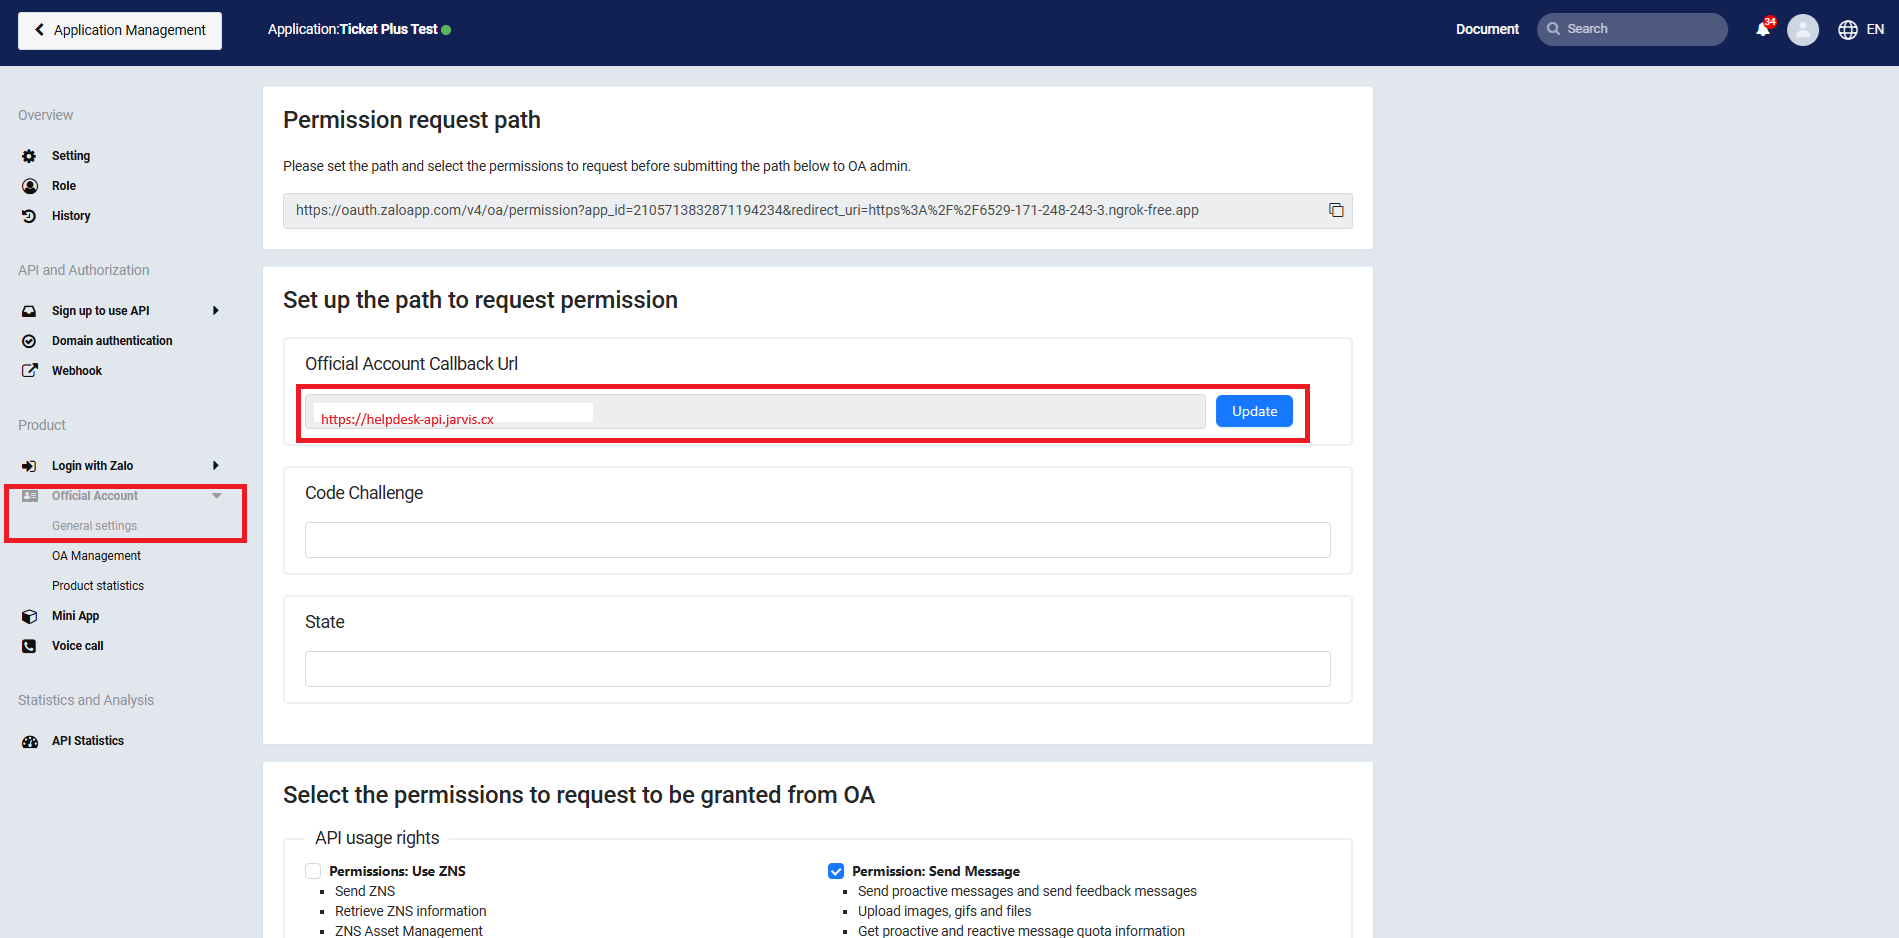
Set callback URL
- Go to API Registration and select Official Account API. Here you need to submit for approval the following permissions:
- Manage user messages
- Send Message
- Ads Management
- User Management Then click Submit for Review
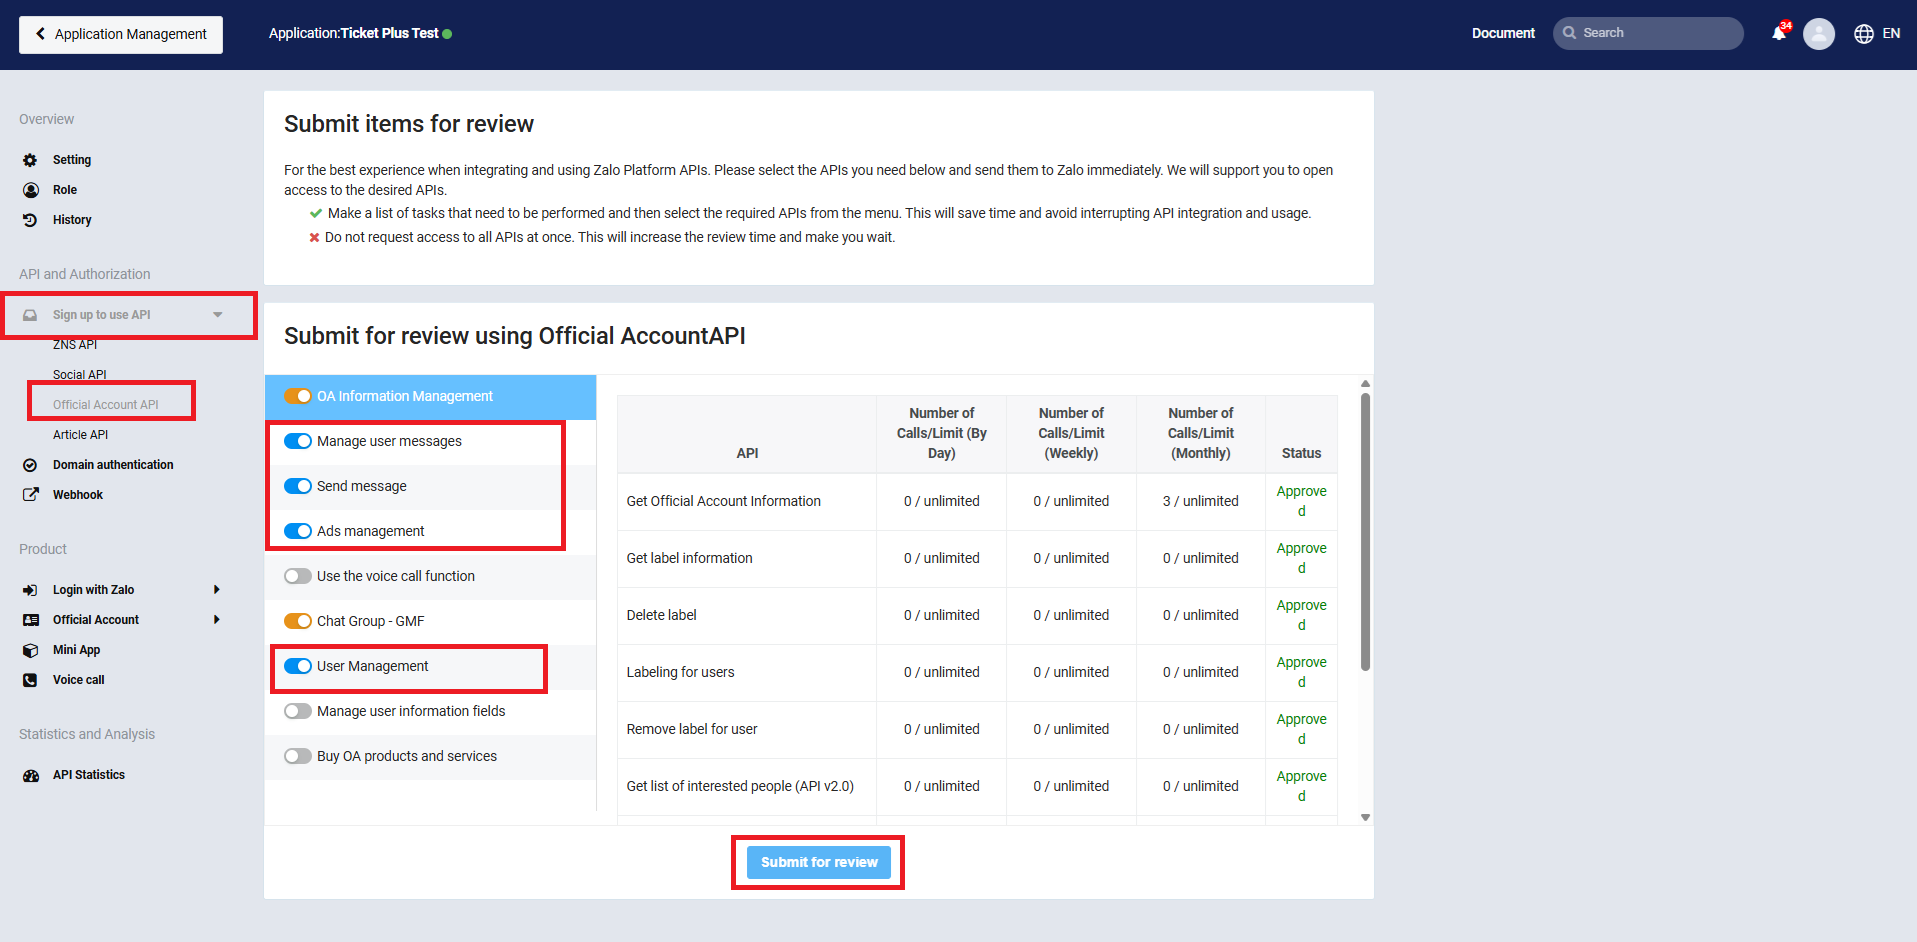
API permissions
-
Go to the App Settings section, enter Contact Email and Contact Phone, then click Save Changes to save this information.
-
Finally, toggle the switch next to Not Activated in the top right corner of the website to activate the application.
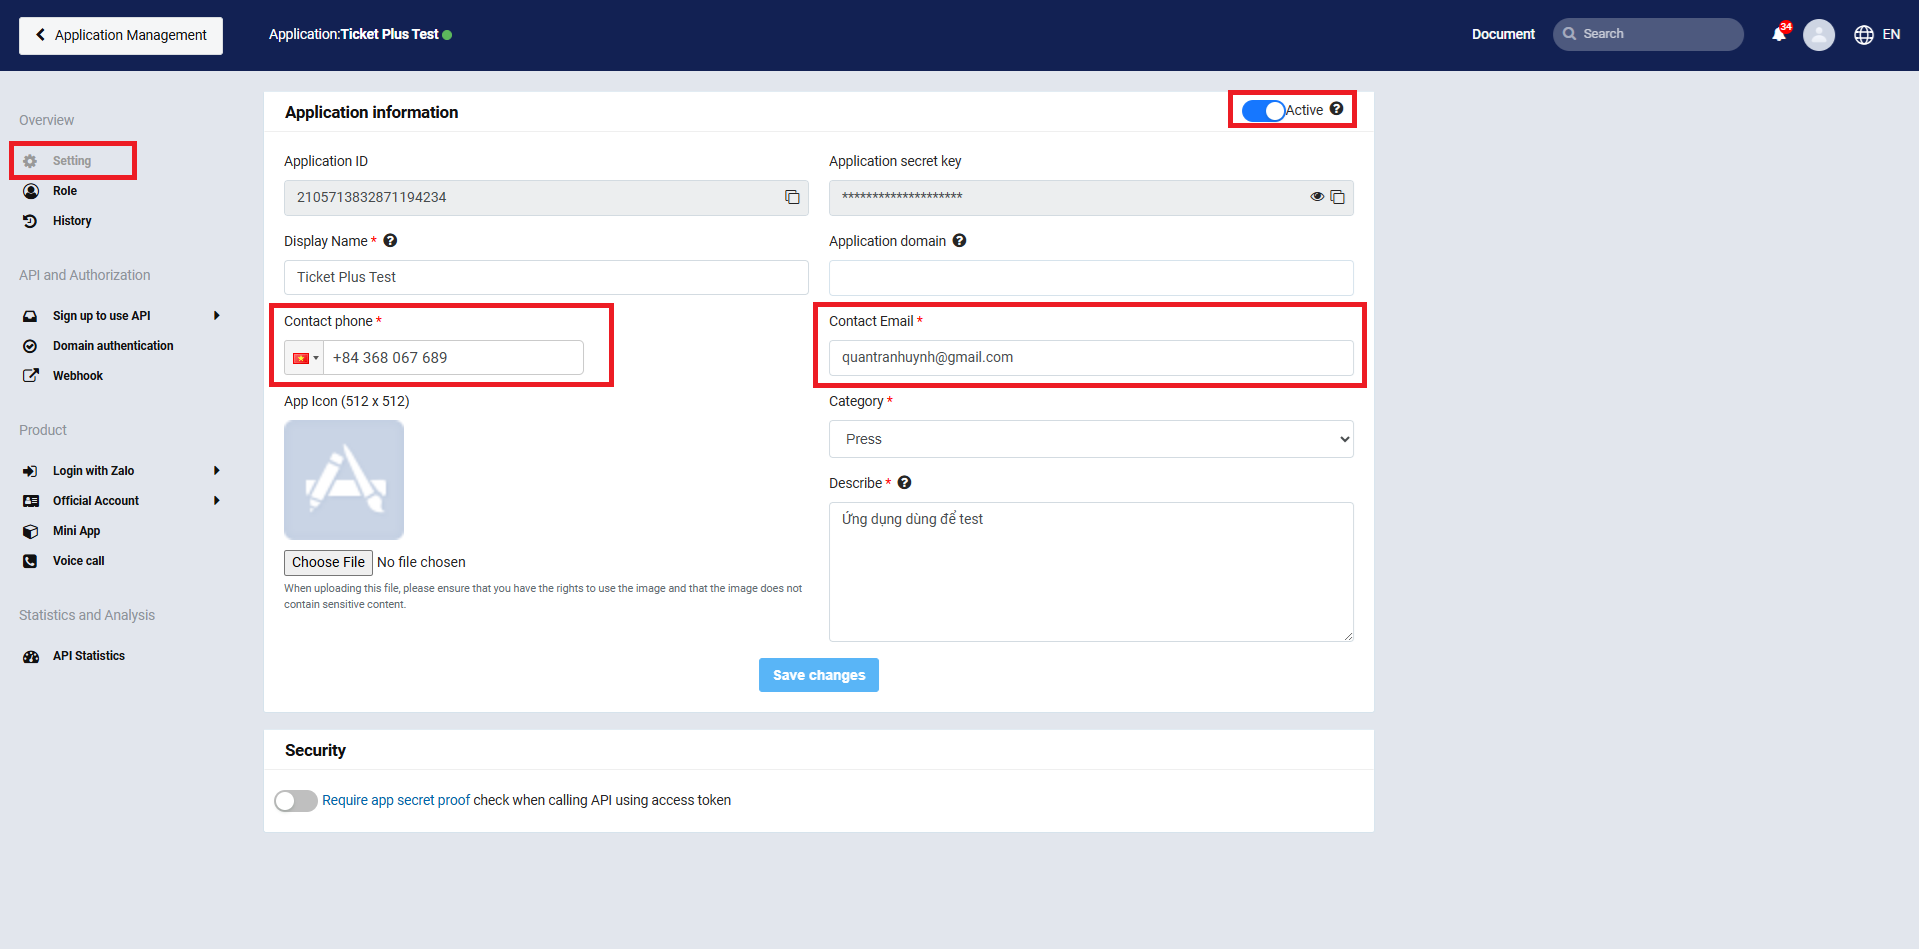
Activate application
Getting Access Token and Refresh Token for Zalo OA
- Go to the General Settings of Official Account and copy the authorization request link.
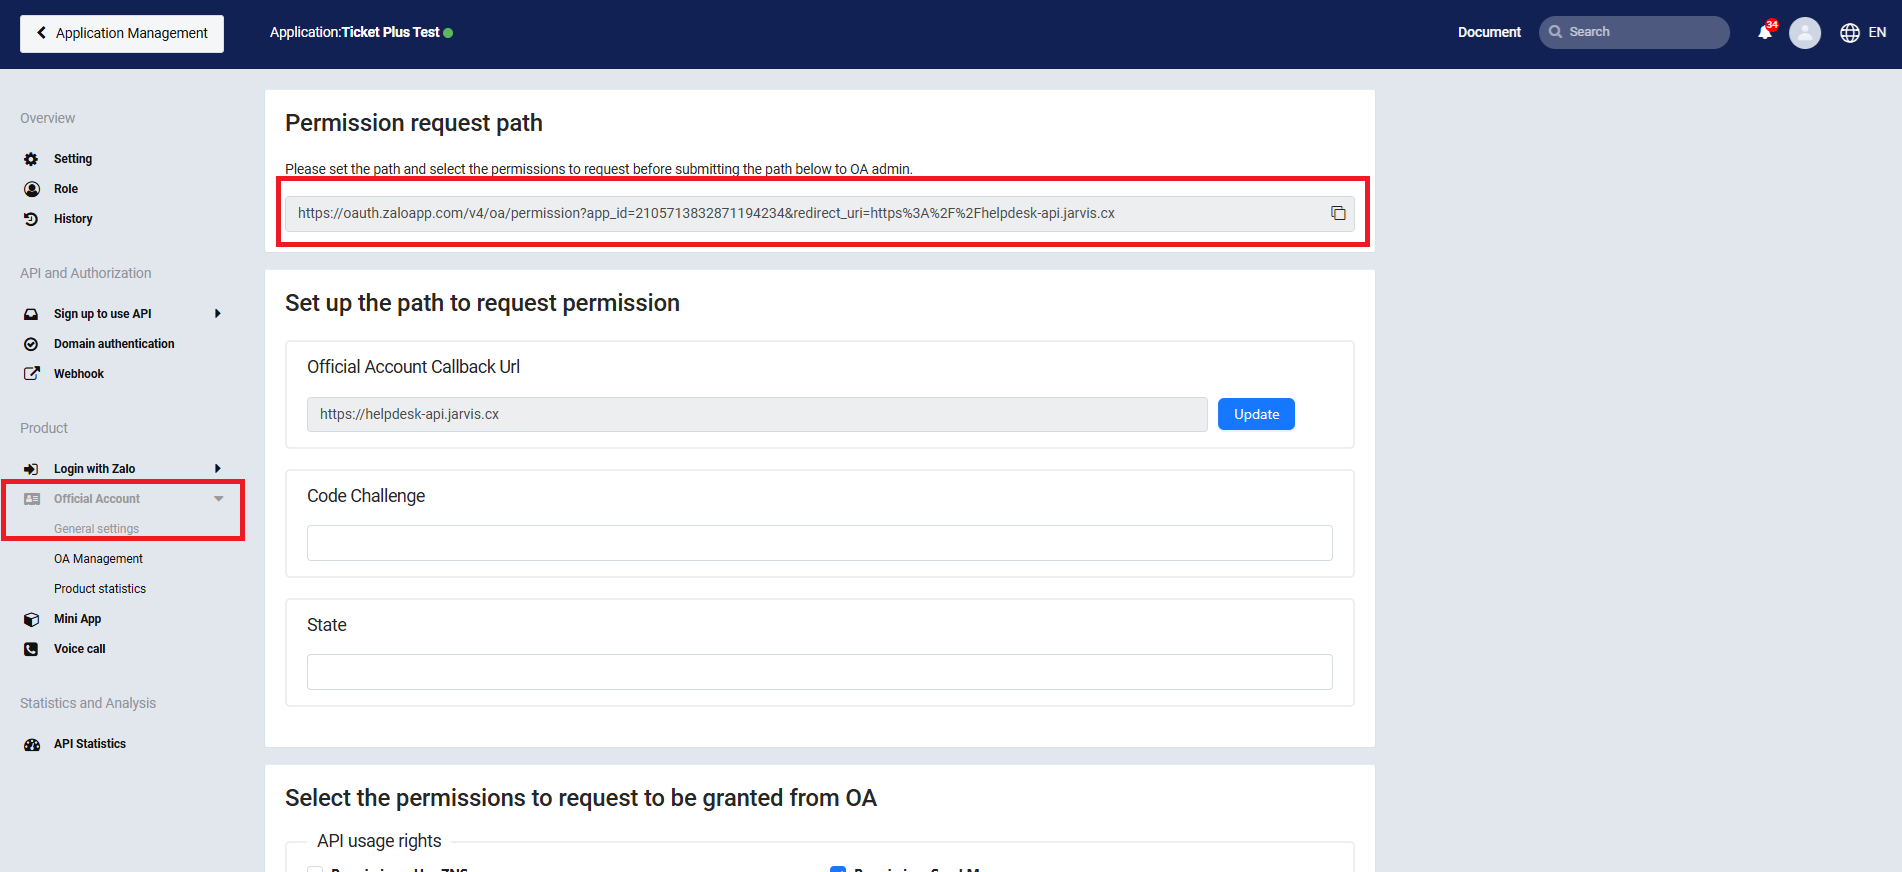
Copy authorization link
- Open a new browser tab, paste the link, and the browser will display the authorization page.

Authorization page
- Select the OA you want to request access for, scroll down, check I have read and completely agree... then click Grant Permission.

Grant permissions
- The browser will redirect to a URL in the format
https://helpdesk-api.jarvis.cx/?oa_id=<OA_ID>&code=<code>. Copy the code value to use for getting tokens.

Get authorization code
- Go to the app settings to get the App ID and App Secret.
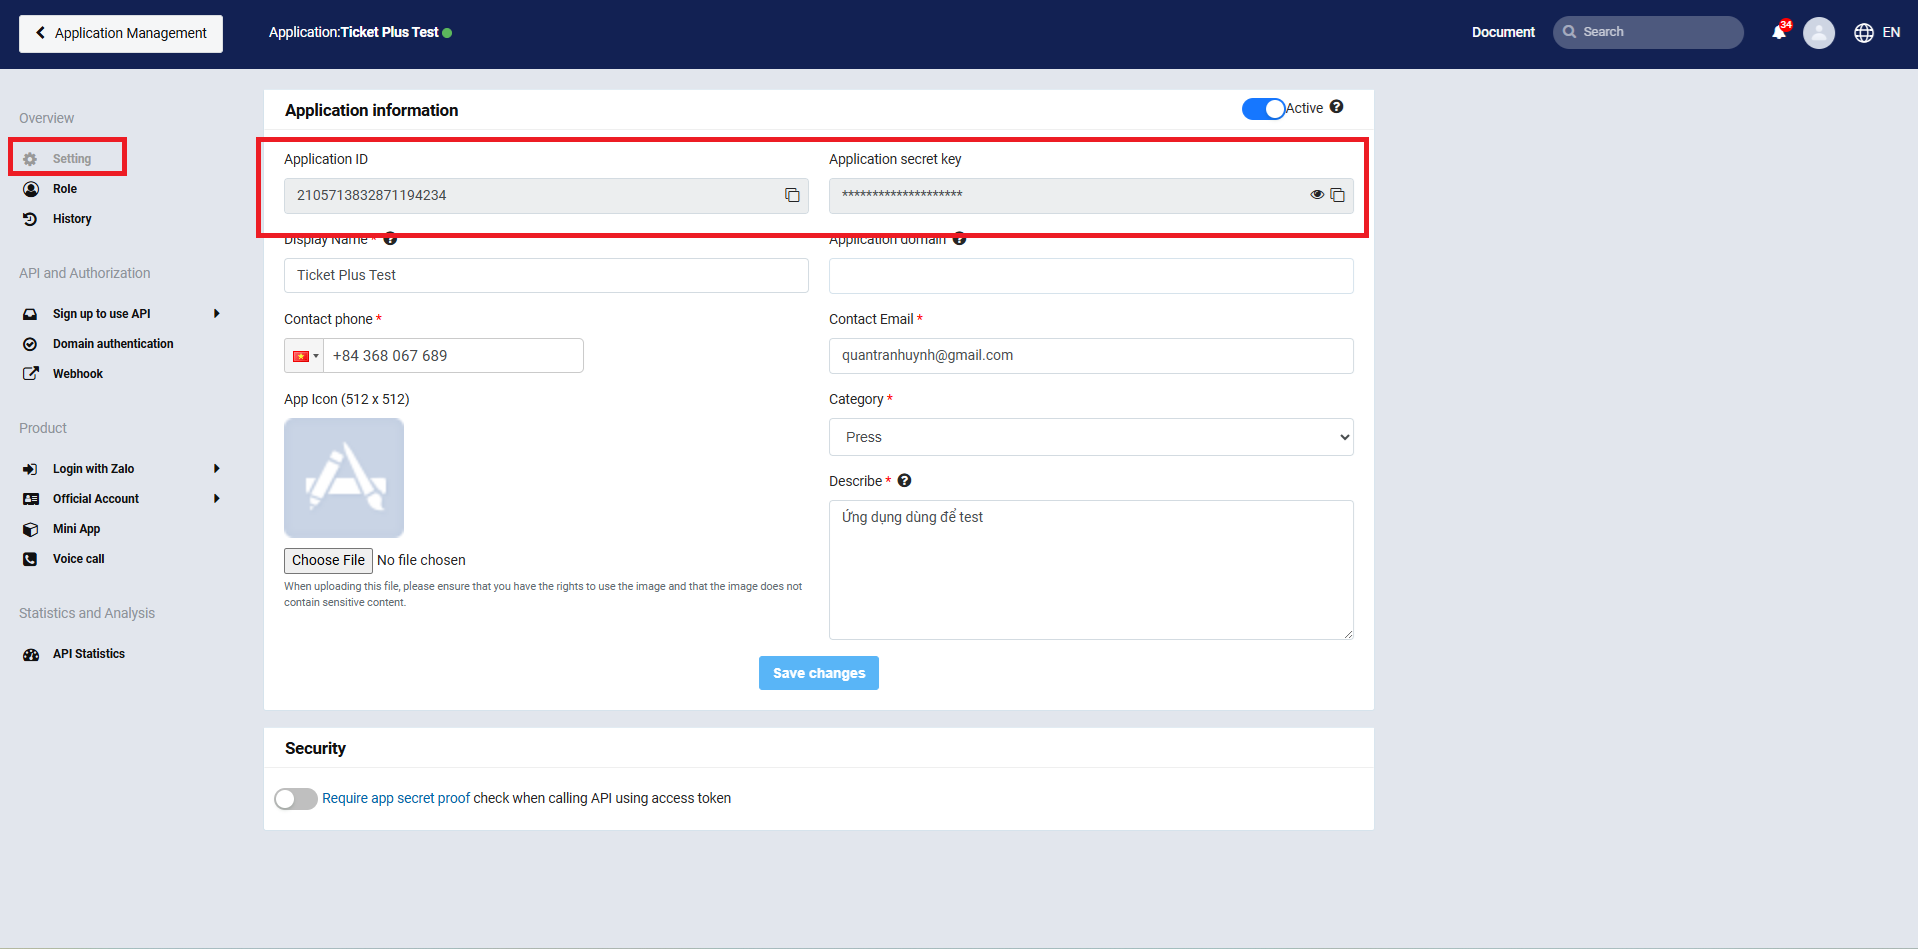
Get app credentials
- Use Postman to get the Access Token and Refresh Token for your Zalo OA account. The request information includes:
- Method: POST
- URL: https://oauth.zaloapp.com/v4/oa/access_token
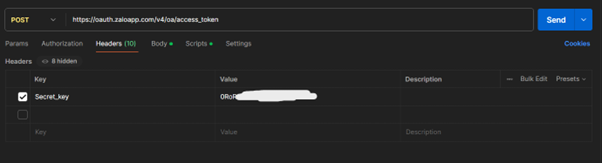
- Header:
- key: secret_key, value: app secret key from step 5
- Body:
- key: app_id, value: App ID from step 5
- key: grant_type, value: authorization_code
- key: code, value: code from step 4
Postman request setup
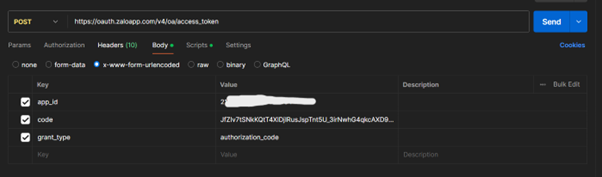
Request body
- Finally, click the Send button in the top right corner of the request. The response will contain the Access Token and Refresh Token for your Zalo OA.
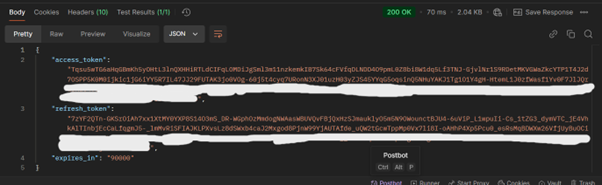
Get tokens
Integrating Zalo OA into Jarvis Helpdesk System
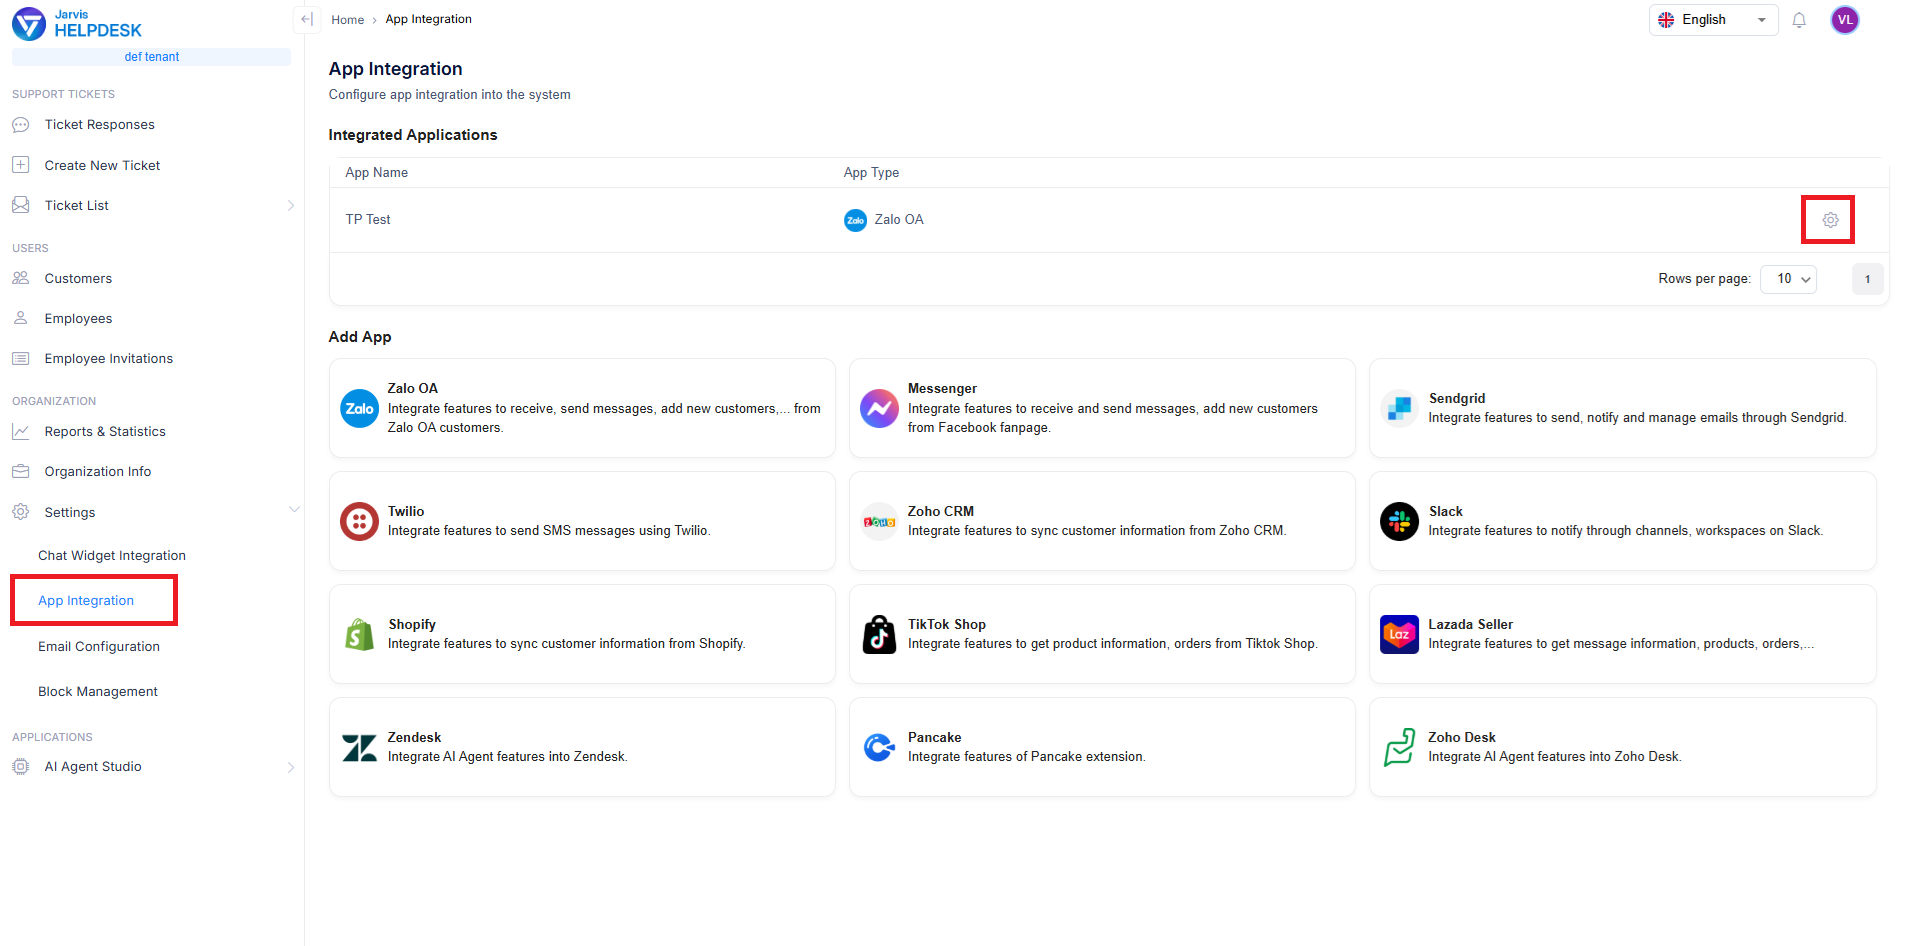
- Go to the App Integration section and add Zalo OA to your organization's applications.
Add Zalo OA integration
- Provide the system with your App ID, App Secret Key (obtained from previous steps), and App Name (which you can customize as desired).
Configure app information
After successful integration, the interface will display as follows:
Integration success
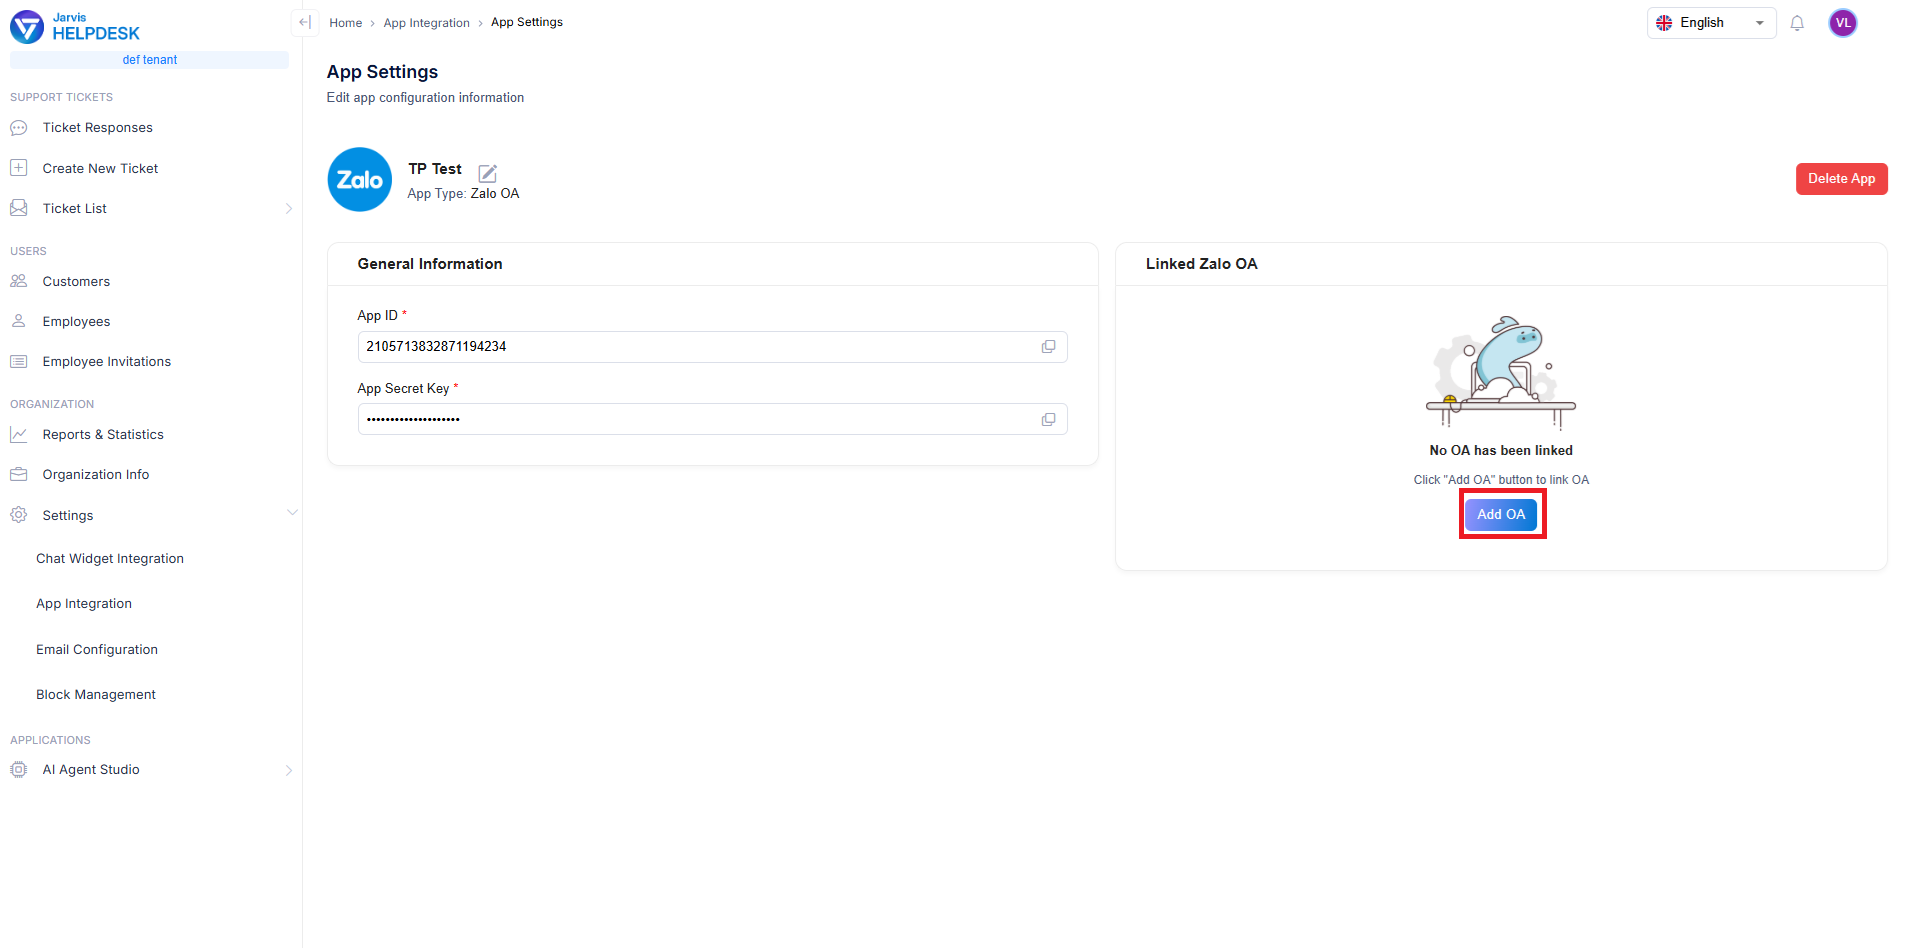
Integration overview
- Click the Add OA button to add OA to your Zalo OA app. A popup will appear requesting OA secret and OA Refresh Token.
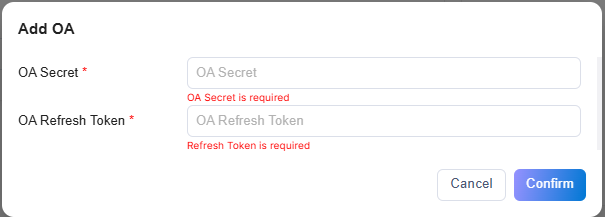
Add OA popup
a. For OA Refresh Token, use the one obtained at the end of the Getting Access Token and Refresh Token section.
b. For OA secret, get it from the Webhook section of your Zalo App on Zalo Developer.
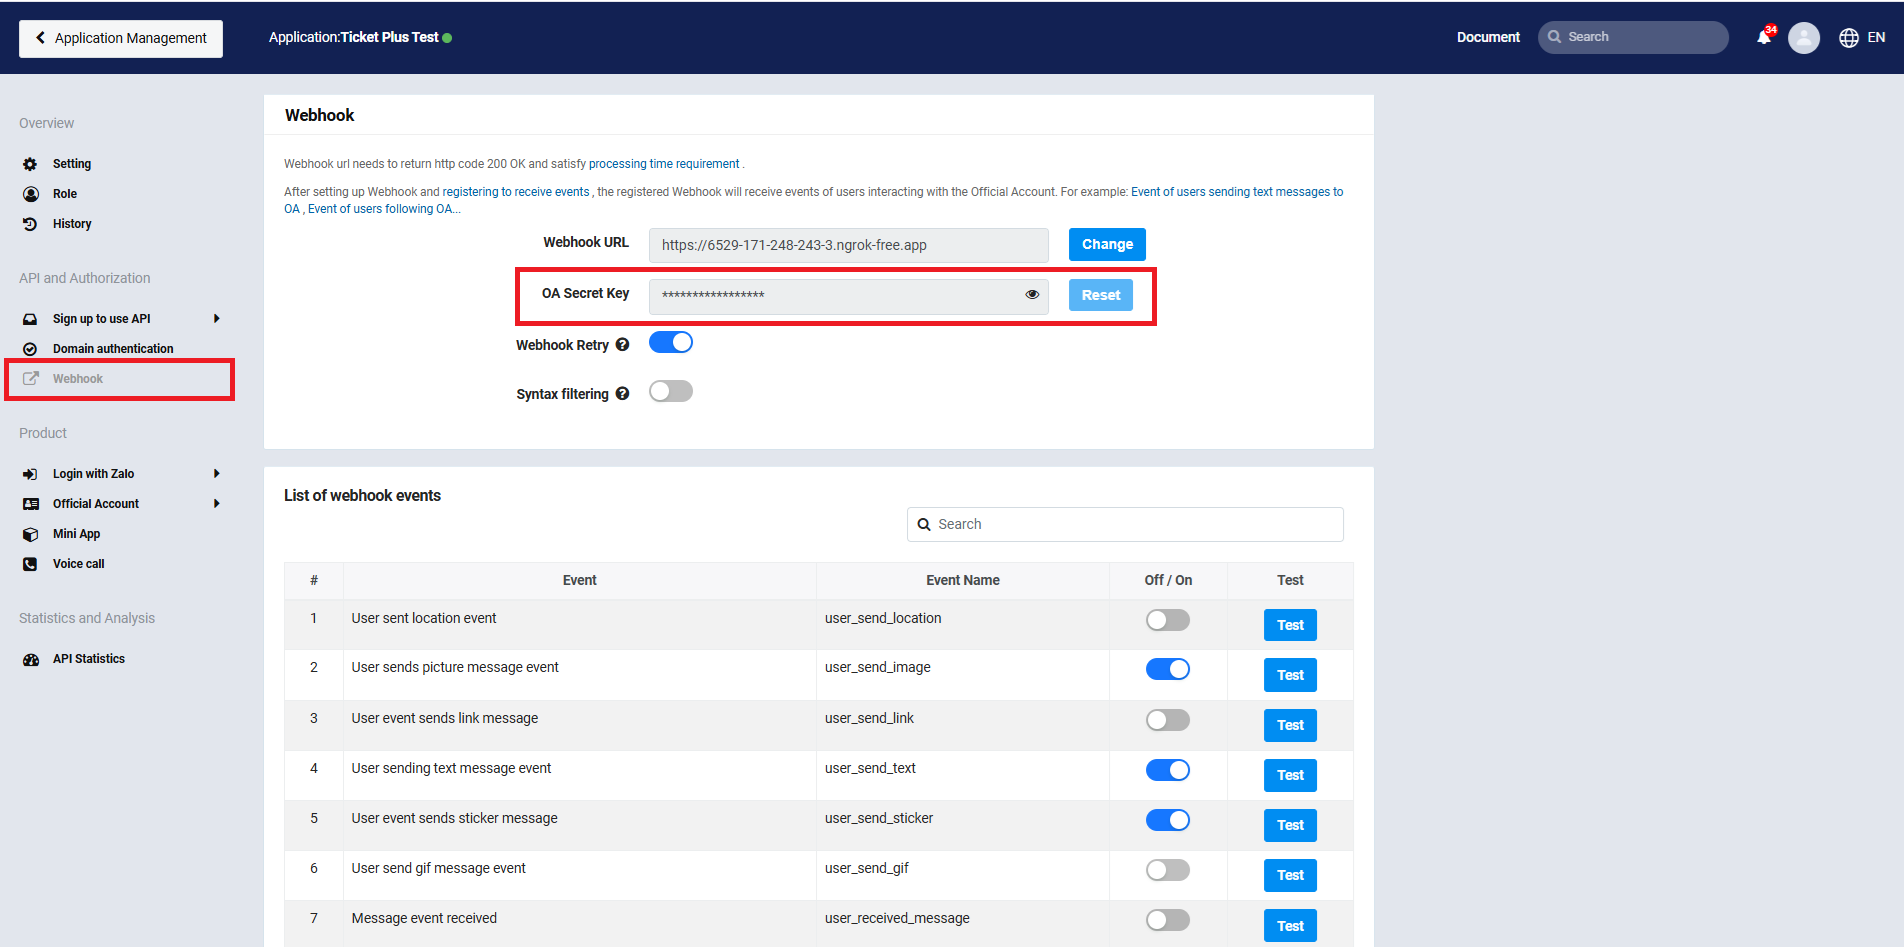
Get OA secret
c. Finally, click Confirm to add the OA.
- After successfully adding the OA, the system will display a Successfully added Zalo OA notification, and the added OA information will be displayed in the Linked OAs section.