Shopify
Welcome to the Shopify Integration section of Jarvis Helpdesk! This guide will walk you through the process of integrating Shopify with the Jarvis Helpdesk system.
Integration Steps
- On the Jarvis Helpdesk page, go to the Settings section, then navigate to App Integration and click on Shopify to begin the integration process.
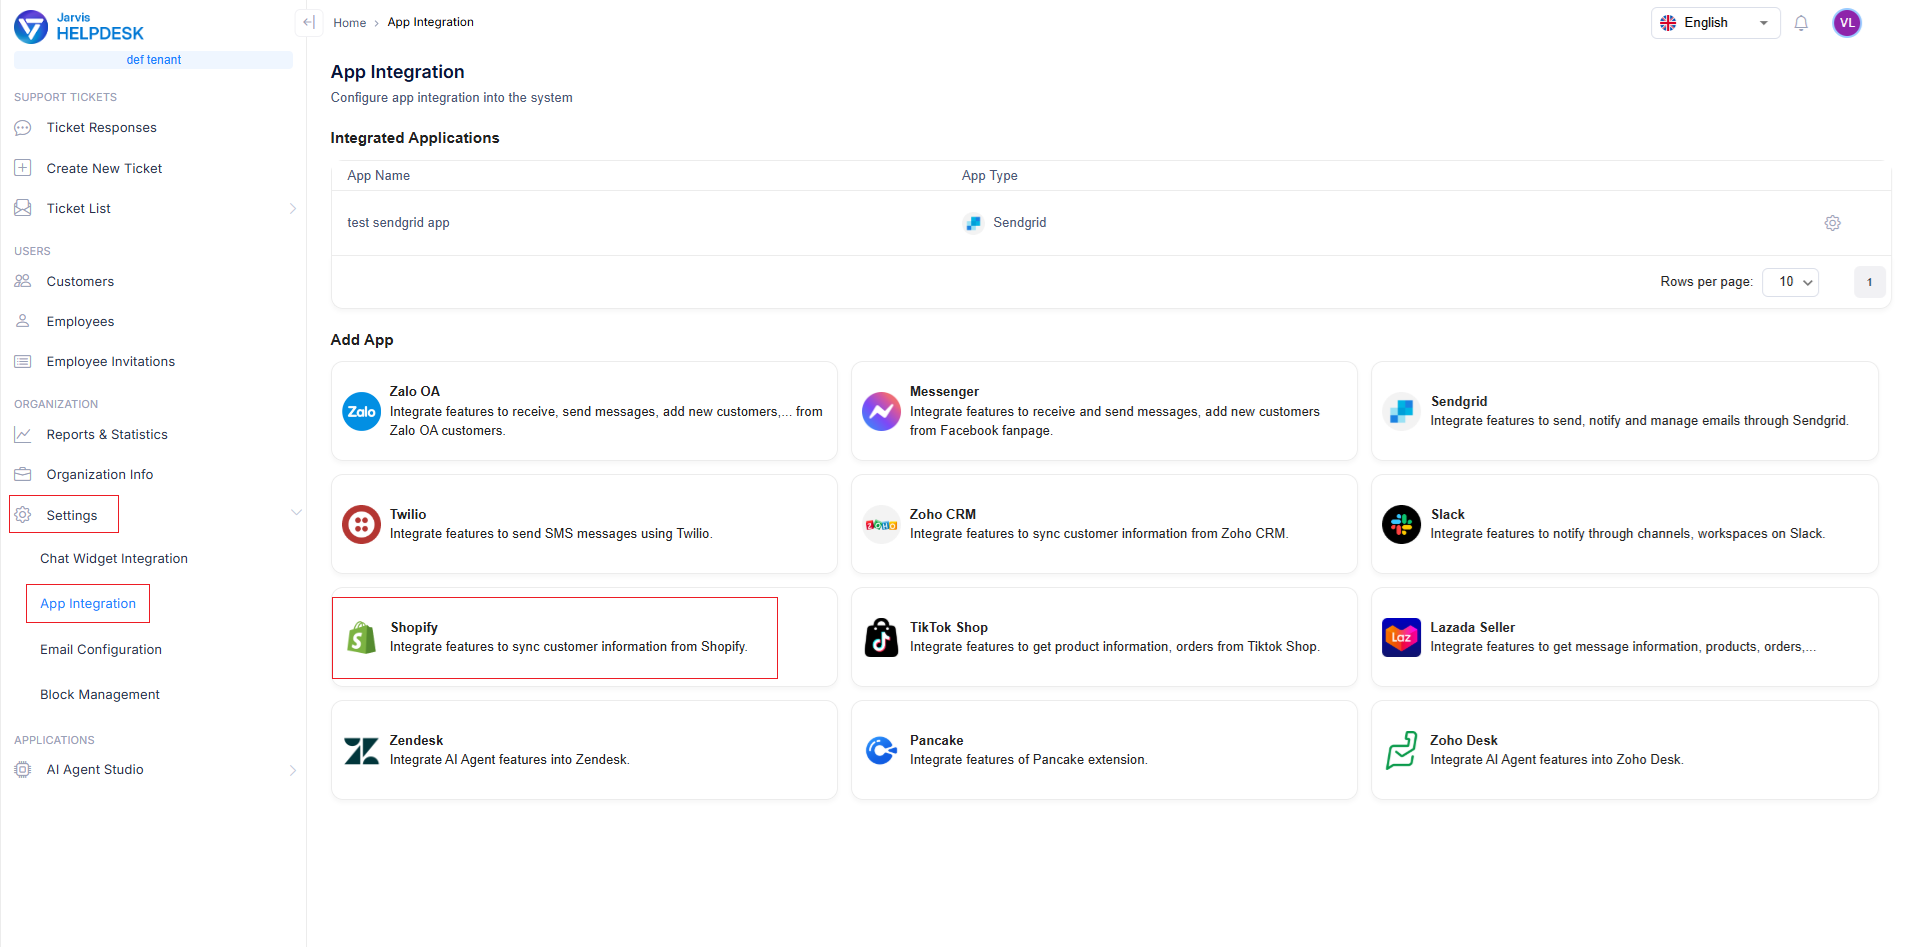
Access Shopify integration
- A dialog box will appear. Click the Integrate button to proceed with the integration.
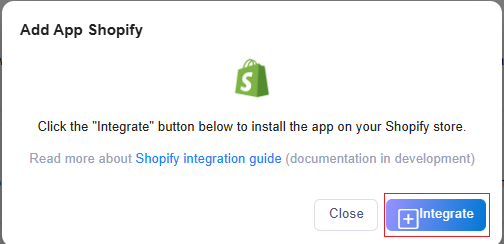
Initiate integration
- You will be redirected to the Jarvis AI Agent Chatbot setup page on Shopify. Click the Install button to begin the installation process.
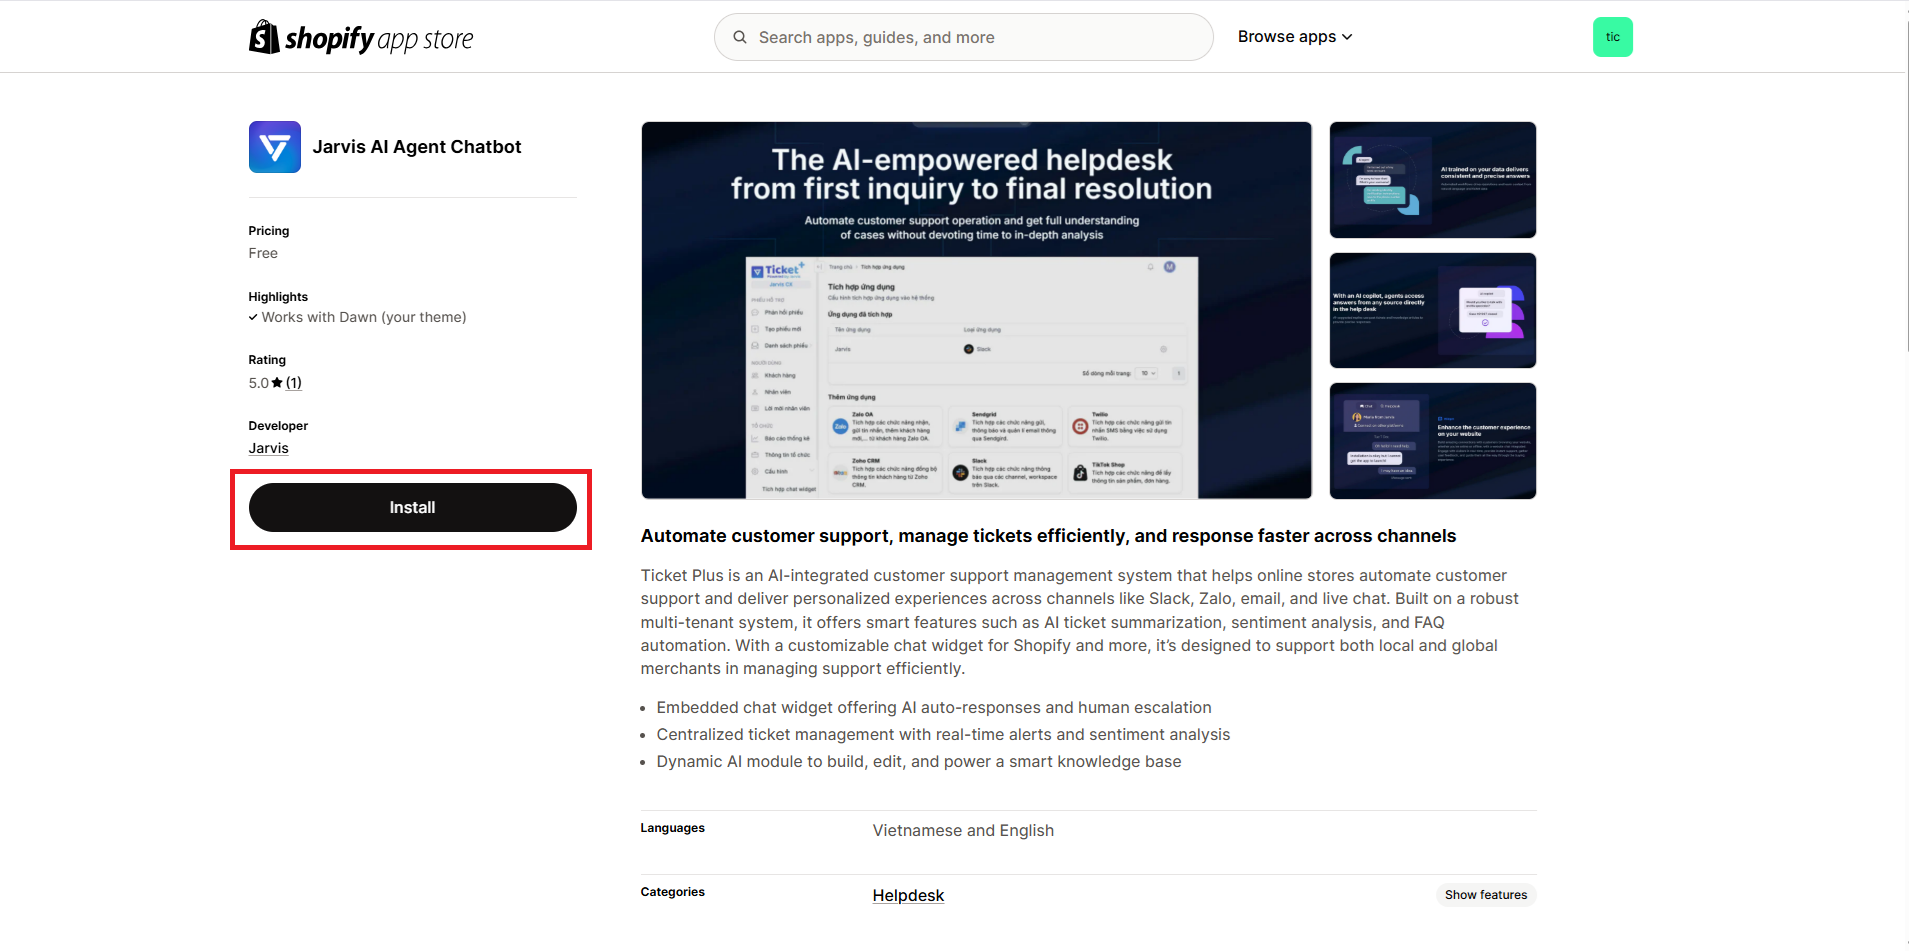
Install Jarvis AI Agent Chatbot
- The screen will redirect to your Shopify admin page, displaying a dialog box with the application you're about to install. Click the Install button to proceed.
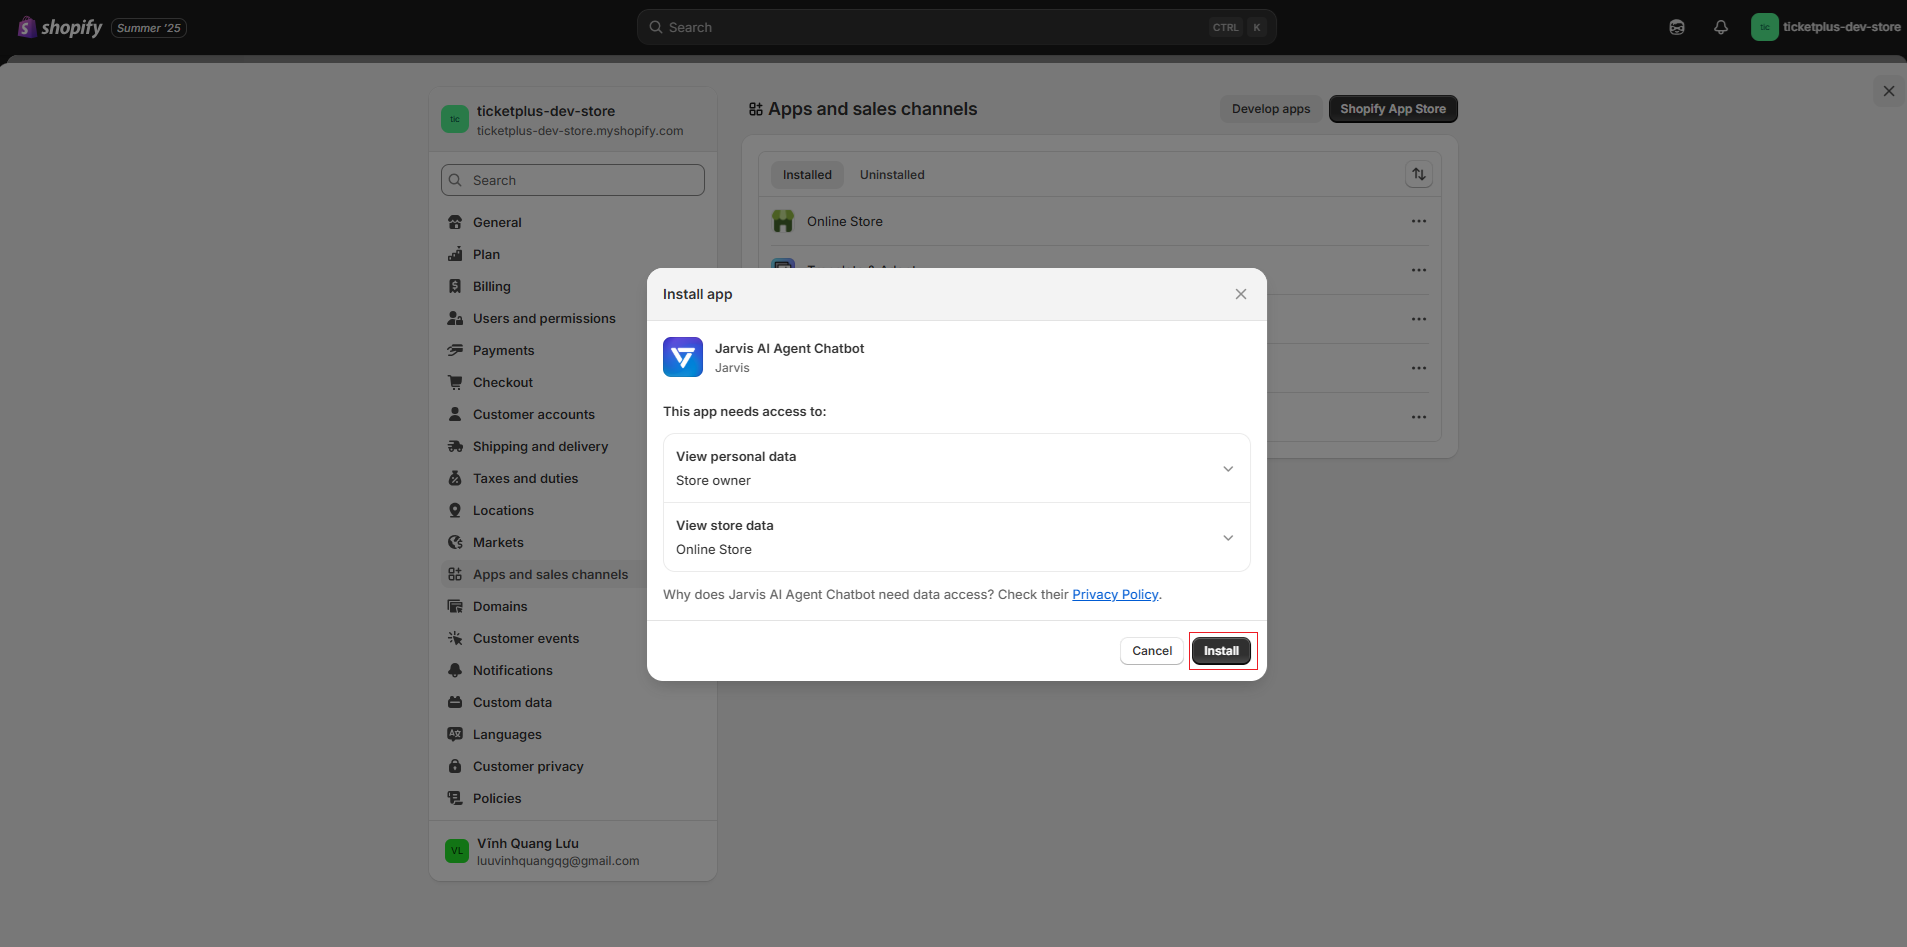
Confirm app installation
- After successful app installation, you will be redirected back to the Jarvis Helpdesk system. The screen will display a list of tenants that can be linked with Shopify. Select your desired tenant and click the Continue button.
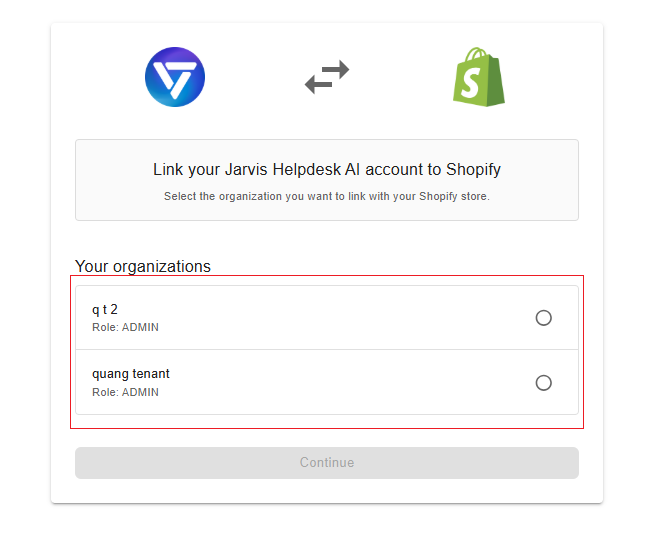
Select tenant
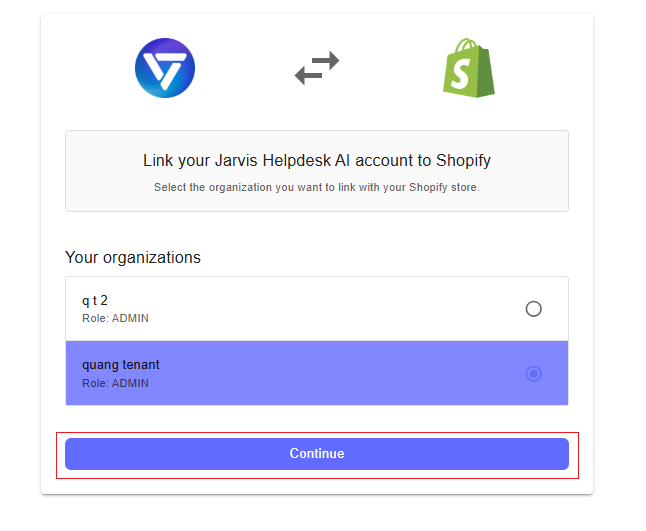
Confirm tenant selection
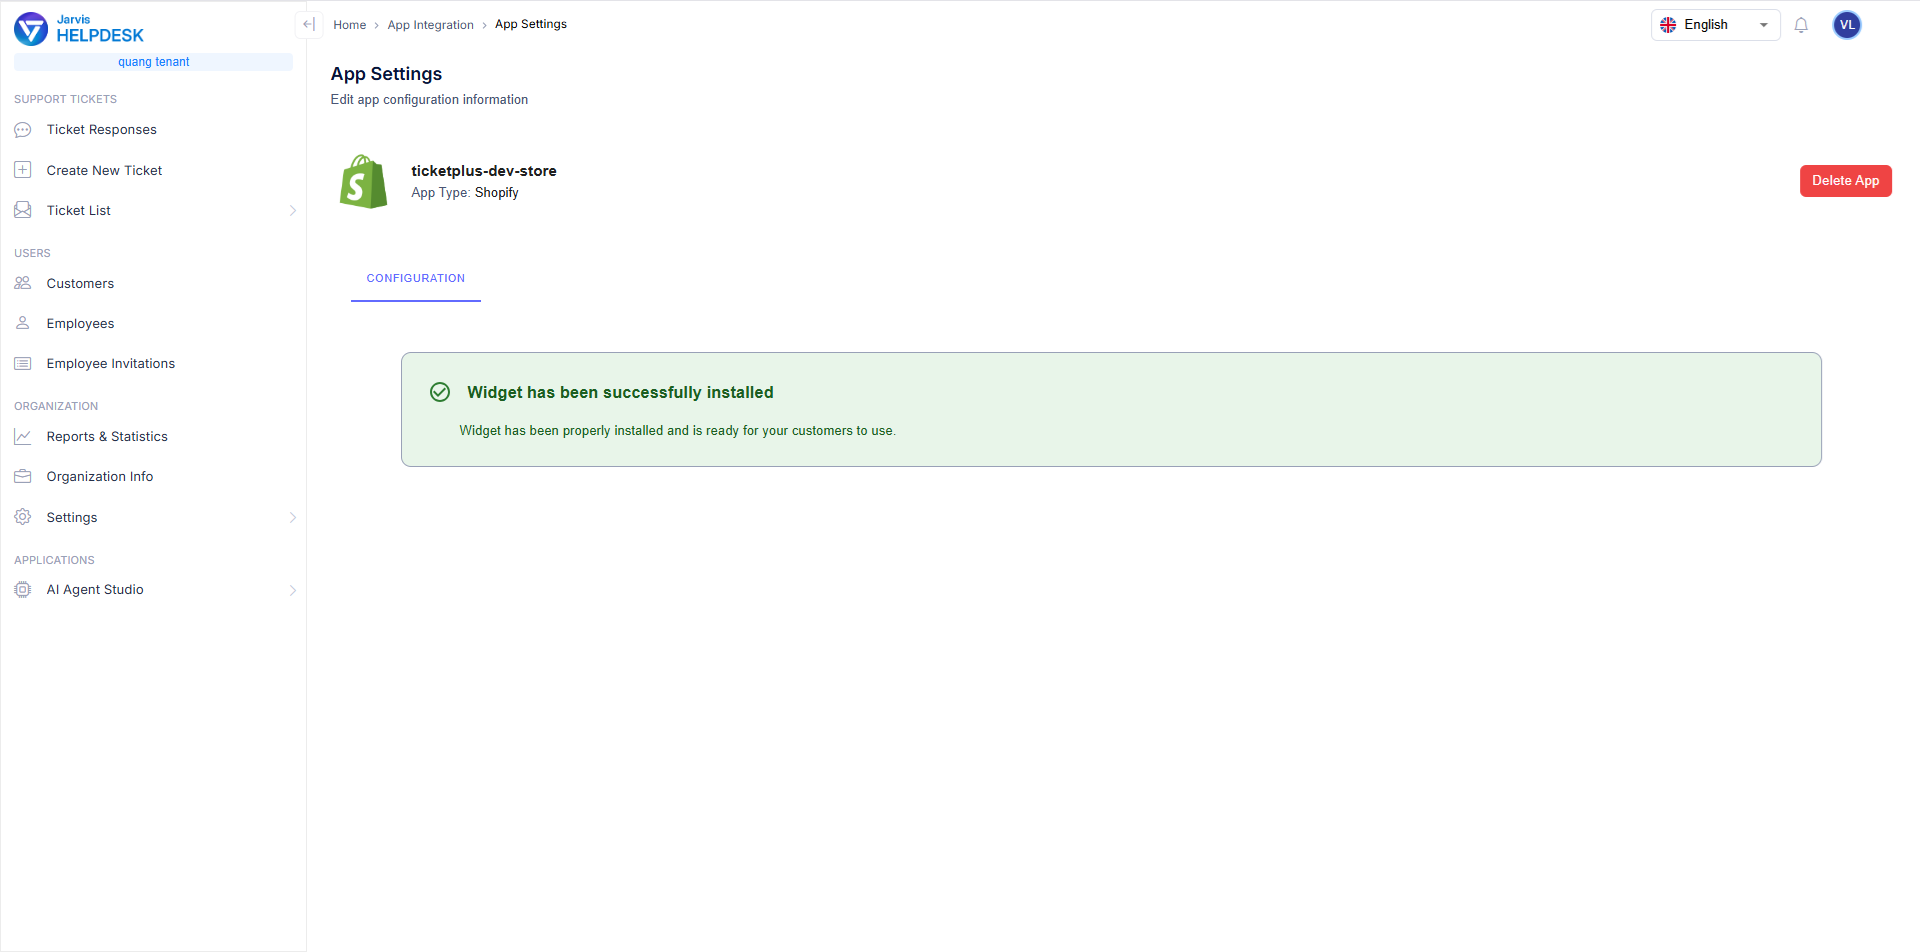
- The system will notify you of successful app addition. To enable the chat widget on your store, click the Go to Shopify Theme Editor button.

Access theme editor
- Your store's settings page will open. Click the Save button in the top right corner of the screen to enable the chat widget.

Save theme changes
- Return to the Jarvis Helpdesk page and click the Go to website button to verify the chat widget integration.
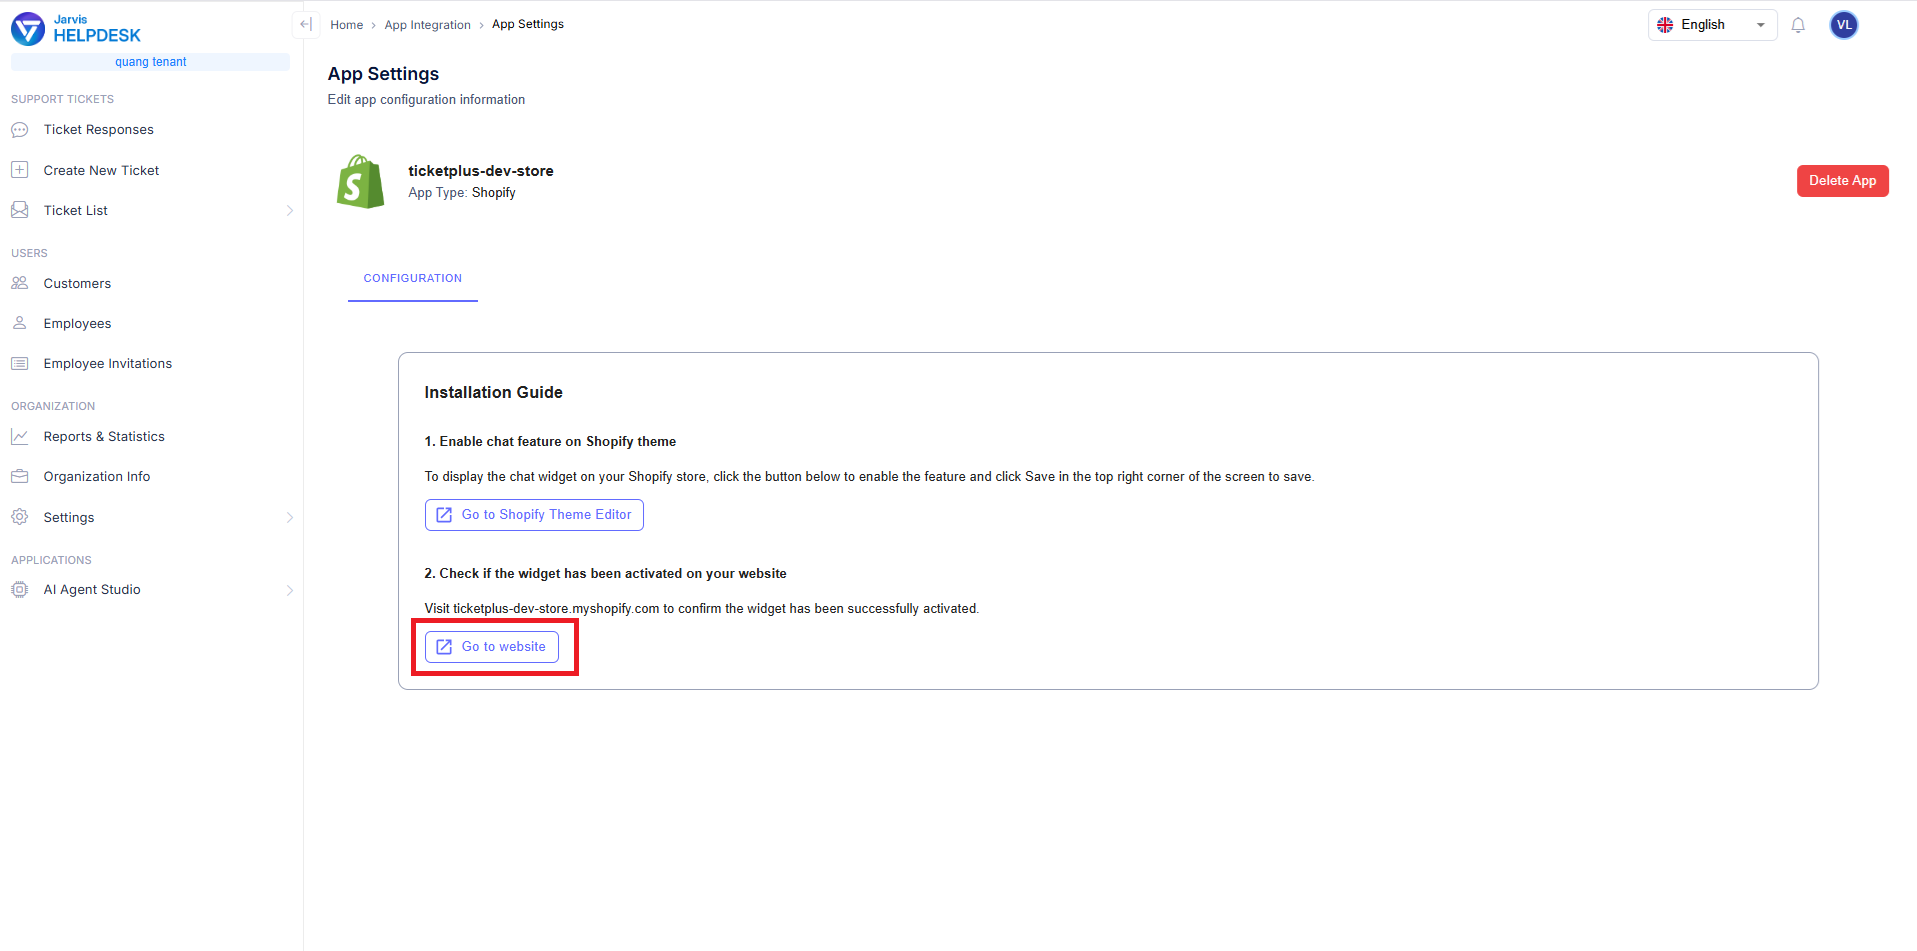
Verify integration
- Your store will open in a new tab, and the Jarvis chat widget will appear in the bottom right corner of the screen, indicating successful integration.
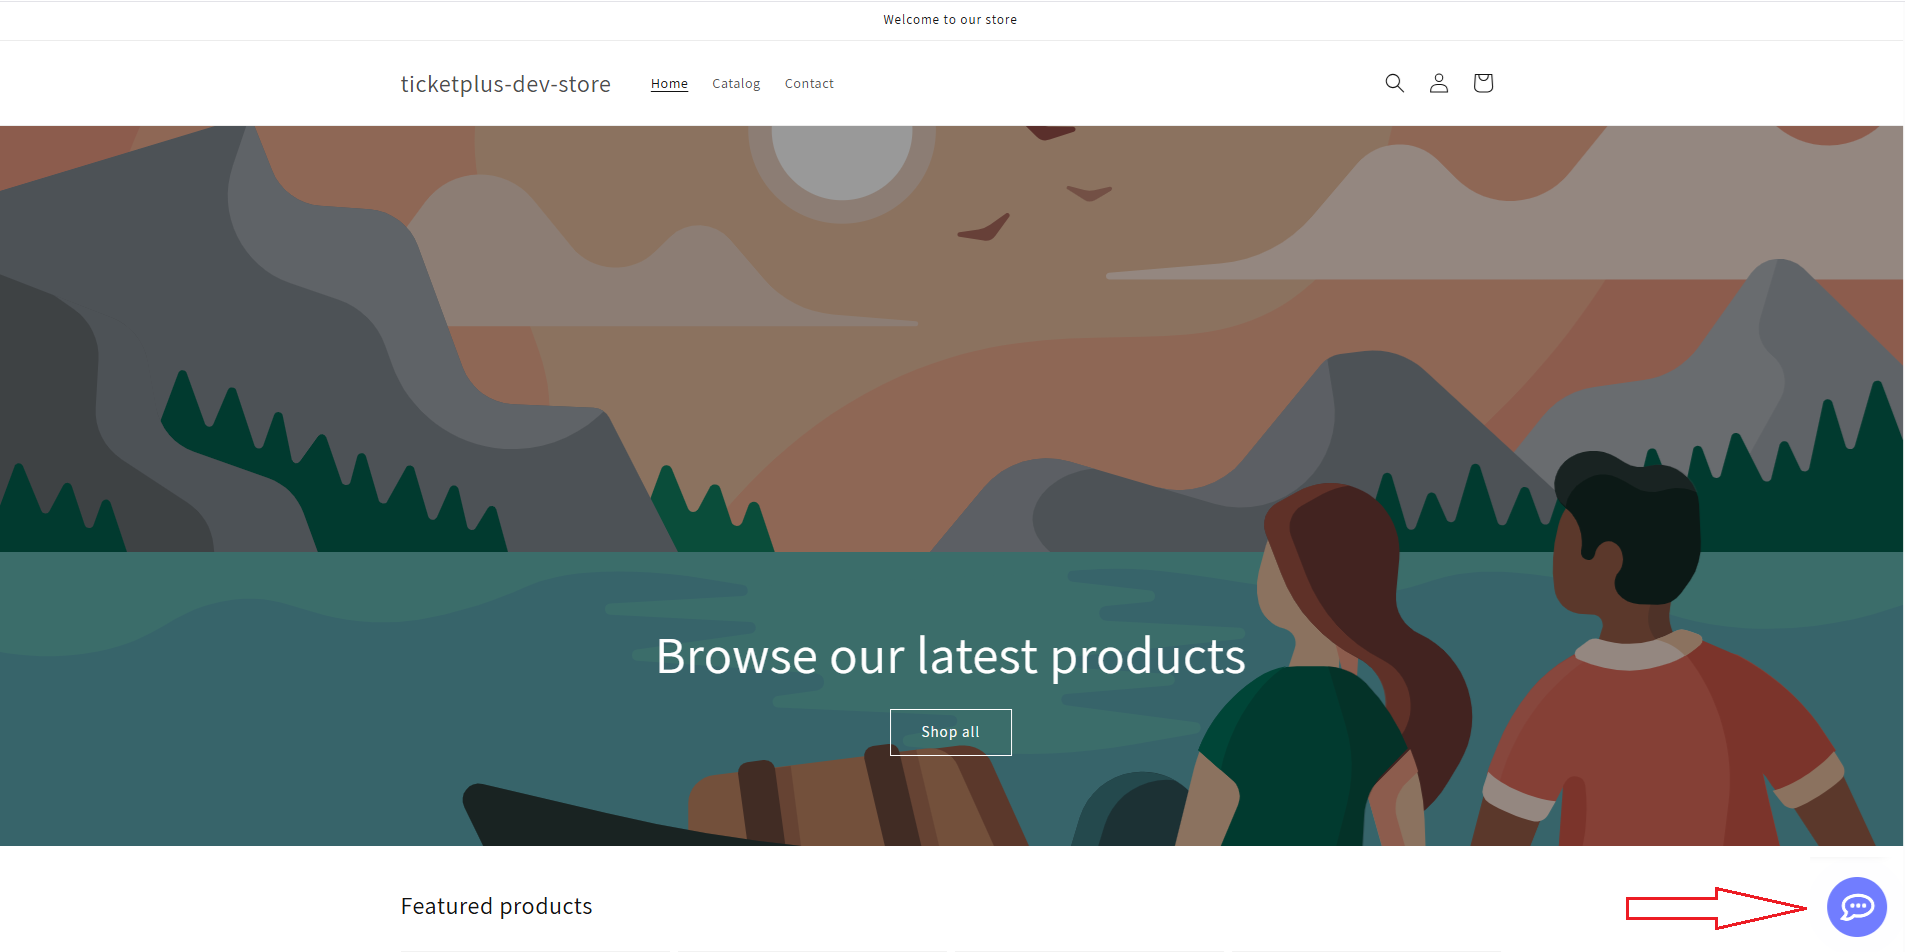
View store with chat widget
Chat widget in action
Note: Make sure to complete all steps in sequence to ensure proper integration of the chat widget on your Shopify store.